

Preface :
LightTPD (Light footprint + httpd = LightTPD) とは、セキュリティ、スピード、操作性、および柔軟性−−これらすべての事柄において、ウェブサーバの効率を最適化します。そんな LightTPD を説明します。LightTPDは、高性能環境のために設計され、最適化されているので少ないメモリによるフットプリントを他のサーバと比較すると、LightTPD はcpuロードアベレージの効果的な管理、そして、高度な機能セット(FastCGI、CGI、Auth、出力圧縮、URL-Rewriting、およびその他多く)を持つことで現在負荷問題を抱えているあらゆるサーバのための完全な解決策になりえます。 そして、それは最もよく、改変された BSDライセンス の下で認可されているオープンソースです。
以下のサイトでApacheとlighttpdのパフォーマンスの比較データが参照できます。
http://www.lighttpd.net/benchmark/
http://litespeedtech.com/products/webserver/benchmark/
http://journal.paul.querna.org/articles/2005/06/24/debunking-lighttpd
LightTPDの著作権は、 Jan Kneschke 氏 にあります。
本サイトは、LightTPDのセットアップを日本語で紹介して普及を目指すサイトであって、LightTPDを開発している団体では有りません。
◆ オフィシャルサイト
◆ 優れた機能群
・基本機能
* バーチャルホスト
* バーチャルディレクトリ・リスト
* URL-Rewriting, HTTP-Redirects
* ファイルの自動的な満了
* ビッグファイルサポート(64bit fileoffsets)
* レングス(開始と終わり、開始-、-終わり、複数のレングス)
* 透過的なキャッシュによるオンザフライアウトプット圧縮
deflate, gzip, bzip2
* 認証
ベーシック、ダイジェスト
バックエンド : プレインファイル、htpasswd、htdigest、ldap
* 安全なアプリケーションを素早くダウンロードします
* サーバサイドインクルード(SSI)
* ユーザトラッキング
* FastCGI、CGI、SSI
・PHPサポート
* apache + mod_php4と 同等、もしくはそれより高速
* FastCGIプロセスの過程をふむためのユーティリティを含みます(PHP 4.3.x以降が必要)
* FastCGI および CGI インタフェースを利用します
* support Code Caches like Turckmm、APC、または eaccelarator
* ロードバランスFastCGI
(FastCGIを通った複数のPHP-サーバを1つのウェブサーバで実現)
・セキュリティ機能
* chroot(), set UID, set GID
* プロテクティング docroot
* 厳密なHTTPヘッダーパージング
◆ 動作プラットフォーム
lighttpdのリリースは、少なくとも以下のプラットフォームで動作します。
* Linux(バイナリパッケージは、FC3、SuSE、Debian、Gentoo、PLD-Linux、OpenWRT)
* BSD(FreeBSD、NetBSD、OpenBSD、MacOS X)
* SGI IRIX
* Windows(Cygwin)
清潔にコンパイルされます。
* Solaris
* AIX
そして、様々な他のPOSIXコンパチブルOS。
◆ ダウンロード
* http://www.lighttpd.net/download/
Mirrors
* http://mirrors.cat.pdx.edu/lighttpd/ ポートランド州立大学(RHEL & CentOS & Vine BuildSources)
External Sources
* Gentoo (included)
* PLD Linux (included)
* Fedora 5 Extra i386 Fedora 6 Extra i386 (included)
* ArchLinux
* Ubuntu dapper
* Debian unstable
* FreeBSD (included)
* NetBSD (pkgsrc)
* OpenBSD
* Windows/Cygwin
* Windows Install (no cygwin required)
* Mac OS X (DarwinPorts)
* Linux/Zaurus (pdaXrom)
* Linux/ARM (Linksys NSLU2)
* Linux/MIPS (OpenWRT)
◆ インストール
■ ソースインストール編( LightTPD + PHP + Postgresql連携 )
インストール環境)
サーバOS:Slackware10 & Nature’s Linux & Debian GNU/Linux etch
データベースエンジン : Postgresql-8.1.3
PHPエンジン : php-5.1.2
サーバOS:Nature’s Linux1.3
データベースエンジン:Postgresql-8.0.4
PHPエンジン:php-4.4.1
注:
lighttpd 1.5バージョンは、libgtk2.0以上が必須のようだ。ソースのconfigureの時に、gthreadクラスをチェックするのでインスコされてないとエラーが出るから注意すること。
1.FastCGIのインストール
FastCGI のインストール lighttpd で CGI を動作させるには、 FastCGI が必ず必要。Perlスクリプトを使うもPHPを使うも、FastCGI が必要のようだ。
2006年4月現在で、 fcgi-2.4.0.tar.gz が最新であった。
# cd /usr/local/src
# wget http://www.fastcgi.com/dist/fcgi-2.4.0.tar.gz
# tar xvfz fcgi-2.4.0.tar.gz
# cd fcgi-2.4.0
# ./configure
# make
# make install
Perlライブラリをインストールする。例の如く、Perl CPAN からインストールする。
# perl -MCPAN -e shell
Terminal does not support AddHistory.
cpan shell — CPAN exploration and modules installation (v1.7601)
ReadLine support available (try ‘install Bundle::CPAN’)
cpan> install FCGI
cpan> install CGI::Fast
cpan> quit
Terminal does not support GetHistory.
Lockfile removed.
2.Perlの正規表現ライブラリlibpcreのインストール
lighttpd は、Perlの正規表現ライブラリ libpcre ( Perl Compatible Regular Expressions ) のインストールを必要としている。
2006年4月現在で、 pcre-6.6.tar.gz が最新であった。
# cd /usr/local/src
# wget ftp://ftp.csx.cam.ac.uk/pub/software/programming/pcre/pcre-6.6.tar.gz
# tar xvfz pcre-6.6.tar.gz
# cd pcre-6.6
# ./configure
# make
# make install
3.PHPのインストール
PHP を使うには、FastCGI が必要でCGI版PHPと言うことになる。CGI版PHPを作るには、PHPをconfigureするとき、オプションパラメータでfastcgiをインクルードする必要がある。したがって、lighttpd で PHP を FastCGI として使う場合は、–enable-fastcgi とする。さらに、その準備として、デフォルトでは、 zlib のインストールと、なんだか libxml2 が必須のようである。また、データベースエンジンは、 Postgresql が既にインストールされているものとする。
ここ では、2006年4月現在、 php-5.1.2.tar.gz が最新であった。
注:fastcgiを使う場合には、2007年7月現在のPHP4の最新バージョンの動作確認は取っているがPHP5の最新バージョンには対応してなかった。ここいら辺はよく注意して欲しい。
# cd /usr/local/src
# wget http://jp.php.net/get/php-5.1.2.tar.gz/from/this/mirror
# tar xvfz php-5.1.2.tar.gz
# cd php-5.1.2
# ./configure \
>–enable-fastcgi \
>–enable-discard-path \
>–enable-force-cgi-redirect \
>–enable-mbstring \
>–enable-mbregex \
>–enable-mbstr-enc-trans \
>–enable-iconv \
>–enable-trans-sid \
>–with-pgsql=/usr/local/pgsql \
>–with-zlib=/usr –with-zlib-dir=/usr
# make
# make install
php.iniを設置する。
# cp php.ini-dist /usr/local/lib/php.ini
4.ログローティションモジュールをインストールする
cronolog をインストールする。lighttpdには、ログローティション機能が無い。そのため、 cronolog と言うログのローティションエンジンをインストールする。
2006年4月現在で、 cronolog-1.6.2 が最新であった。
# cd /usr/local/src
# wget http://cronolog.org/download/cronolog-1.6.2.tar.gz
# tar xvfz cronolog-1.6.2.tar.gz
# cd cronolog-1.6.2
# ./configure
# make
# make install
5.lighttpdのインストール
いよいよ、ここで目玉の lighttpd をインストールする。ゲットする場所は、もちろん オフィシャルサイトの ここ 。
2006年4月現在で、 lighttpd-1.4.11.tar.gz が最新であった。
# cd /usr/local/src
# wget http://www.lighttpd.net/download/lighttpd-1.4.11.tar.gz
# tar xvfz lighttpd-1.4.11.tar.gz
# cd lighttpd-1.4.11
# ./configure
# make
# make install
# ln -s /usr/local/sbin/lighttpd /usr/sbin/lighttpd
1)Slackware10の場合
# cp doc/rc.lighttpd.redhat /etc/rc.d/rc.lighttpd
# chmod 755 /etc/rc.d/rc.lighttpd
2)Nature’s Linux1.3の場合
# cp doc/rc.lighttpd.redhat /etc/init.d/lighttpd
# chmod 755 /etc/init.d/lighttpd
# cp doc/lighttpd.conf /usr/local/etc/
6.lighttpd.confの編集
lighttpd.confを編集する。
ここでのコンフィグは、以下をポリシーとして設定する。
① cgiを使う
② phpを使う
③ ドキュメントルートは、/usr/local/apache/htdocs
④ ユーザ公開ディレクトリを設定(public_html)
⑤ アクセスログは、cronologでローティションする
⑥ ssiを利用する
⑦ Script Aliasを /cgi-bin/ /icons/ へ設定する
⑧ indexファイルを、index.php、index.html、index.htm、index.cgi、index.pl、default.htmlに設定する
# vi /usr/local/etc/lighttpd.conf
# httpdサーバが使うモジュールの選択
server.modules = (
”mod_fastcgi”,
”mod_cgi”,
”mod_rewrite”,
”mod_userdir”,
”mod_access”,
”mod_auth”,
”mod_setenv”,
”mod_ssi”,
”mod_simple_vhost”,
”mod_accesslog” )
注:lighttpd.confでmod_fastcgiとmod_cgiを先頭に宣言しないと、lighttpd起動時エラーが出るので気を付けること。
# ドキュメントルート
server.document-root = “/usr/local/apache/htdocs/”
# ユーザ公開ディレクトリ名
userdir.path = “public_html”
# ユーザ公開ディレクトリパス(通常は、 /home/ で良いと思う)
userdir.basepath = “/home/”
# エラーログパス
server.errorlog = “/usr/local/apache/logs/error_log”
# cgi-bin と iconsのaliasを作る(apacheで言うScriptAliasのこと)
alias.url = (
”/cgi-bin/” => “/usr/local/apache/cgi-bin/”,
”/icons/” => “/usr/local/apache/icons/”
)
# Apache の Option Indexes と同じ意味。downloadディレクトリにHTTPダウンロード領域を作る。
$HTTP[“url”] =~”/download” {
dir-listing.activate = “enable”
}
# indexファイルネームパターン
index-file.names = ( “index.php”, “index.html”,
”index.htm”, “default.htm”,
”index.cgi”, “index.pl” )
# mimetype
mimetype.assign = (
”.pdf” => “application/pdf”,
”.sig” => “application/pgp-signature”,
”.spl” => “application/futuresplash”,
”.class” => “application/octet-stream”,
”.ps” => “application/postscript”,
”.torrent” => “application/x-bittorrent”,
”.dvi” => “application/x-dvi”,
”.gz” => “application/x-gzip”,
”.pac” => “application/x-ns-proxy-autoconfig”,
”.swf” => “application/x-shockwave-flash”,
”.tar.gz” => “application/x-tgz”,
”.tgz” => “application/x-tgz”,
”.tar” => “application/x-tar”,
”.zip” => “application/zip”,
”.mp3″ => “audio/mpeg”,
”.m3u” => “audio/x-mpegurl”,
”.wma” => “audio/x-ms-wma”,
”.wax” => “audio/x-ms-wax”,
”.ogg” => “application/ogg”,
”.wav” => “audio/x-wav”,
”.gif” => “image/gif”,
”.jpg” => “image/jpeg”,
”.jpeg” => “image/jpeg”,
”.png” => “image/png”,
”.xbm” => “image/x-xbitmap”,
”.xpm” => “image/x-xpixmap”,
”.xwd” => “image/x-xwindowdump”,
”.css” => “text/css”,
”.html” => “text/html”,
”.htm” => “text/html”,
”.js” => “text/javascript”,
”.asc” => “text/plain”,
”.c” => “text/plain”,
”.cpp” => “text/plain”,
”.log” => “text/plain”,
”.conf” => “text/plain”,
”.text” => “text/plain”,
”.txt” => “text/plain”,
”.dtd” => “text/xml”,
”.xml” => “text/xml”,
”.mpeg” => “video/mpeg”,
”.mpg” => “video/mpeg”,
”.mov” => “video/quicktime”,
”.qt” => “video/quicktime”,
”.avi” => “video/x-msvideo”,
”.asf” => “video/x-ms-asf”,
”.asx” => “video/x-ms-asf”,
”.wmv” => “video/x-ms-wmv”,
”.bz2″ => “application/x-bzip”,
”.tbz” => “application/x-bzip-compressed-tar”,
”.tar.bz2″ => “application/x-bzip-compressed-tar”
)
# アクセスログファイルパス(cronologでlogのローティションを行うので以下のように設定)
accesslog.filename = “|/usr/local/sbin/cronolog /usr/local/apache/logs/access_log.%Y%m%d”
# Apache LogFormatに対応する設定
accesslog.format = “%h %l %u %t \”%r\” %>s %b \”%{Referer}i\” \”%{User-Agent}i\””
# サーバサービスポートの設定
server.port = 80
# ErrorDocument 404設定
server.error-handler-404 = “/404.html”
# pidファイルパス
server.pid-file = “/var/run/lighttpd.pid”
# lighttpd ユーザ
server.username = “nobody”
# lighttpd グループ
server.groupname = “nobody”
# FastCgiConfig:ここでは、fastcgiを使ってphpを動かす設定をしている
fastcgi.server = ( “.php” =>
( “localhost” =>
(
”socket” => “/tmp/php-fastcgi.socket”,
”bin-path” => “/usr/local/bin/php-cgi”
)
),
”.php4″ =>
( “localhost” =>
(
”socket” => “/tmp/php-fastcgi.socket”,
”bin-path” => “/usr/local/bin/php-cgi”
)
),
”.php3″ =>
( “localhost” =>
(
”socket” => “/tmp/php-fastcgi.socket”,
”bin-path” => “/usr/local/bin/php-cgi”
)
)
)
# AddHandler cgi-scriptを設定
cgi.assign = ( “.pl” => “/usr/bin/perl”,
”.cgi” => “/usr/bin/perl” )
# ssiを利用する
ssi.extension = ( “.shtml” )
7.起動スクリプトを作る
ここでのlighttpdは、slackwareにインストールしたのでslackwareの起動スクリプトに編集する。
1) Slackware10の場合
# vi /etc/rc.d/rc.lighttpd
#!/bin/sh
#
# lighttpd Startup script for the lighttpd server
if [ -z “$LIGHTTPD_CONF_PATH” ]; then
LIGHTTPD_CONF_PATH=”/usr/local/etc/lighttpd.conf“
fi
prog=”lighttpd”
lighttpd=”/usr/sbin/lighttpd”
RETVAL=0
start() {
echo -n $”Starting $prog: “
$lighttpd -f $LIGHTTPD_CONF_PATH
RETVAL=$?
echo
[ $RETVAL -eq 0 ] && touch /var/lock/subsys/$prog
return $RETVAL
}
stop() {
echo -n $”Stopping $prog: “
killall $lighttpd
killall php
RETVAL=$?
echo
[ $RETVAL -eq 0 ] && rm -f /var/lock/subsys/$prog
return $RETVAL
}
reload() {
echo -n $”Reloading $prog: “
killall $lighttpd -HUP
killall php -HUP
RETVAL=$?
echo
return $RETVAL
}
case “$1” in
start)
start
;;
stop)
stop
;;
restart)
stop
start
;;
condrestart)
if [ -f /var/lock/subsys/$prog ]; then
stop
start
fi
;;
reload)
reload
;;
status)
status $lighttpd
RETVAL=$?
;;
*)
echo $”Usage: $0 {start|stop|restart|condrestart|reload|status}”
RETVAL=1
esac
exit $RETVAL
2)Nature’s Linux1.3の場合
[VFS-root@michi ]# vi /etc/init.d/lighttpd
#!/bin/sh
#
# lighttpd Startup script for the lighttpd server
#
# chkconfig: – 85 15
# description: Lightning fast webserver with light system requirements
#
# processname: lighttpd
# config: /etc/lighttpd/lighttpd.conf
# config: /etc/sysconfig/lighttpd
# pidfile: /var/run/lighttpd.pid
#
# Note: pidfile is assumed to be created
# by lighttpd (config: server.pid-file).
# If not, uncomment ‘pidof’ line.
# Source function library
. /etc/rc.d/init.d/functions
if [ -f /etc/sysconfig/lighttpd ]; then
. /etc/sysconfig/lighttpd
fi
if [ -z “$LIGHTTPD_CONF_PATH” ]; then
LIGHTTPD_CONF_PATH=”/usr/local/etc/lighttpd.conf“
fi
prog=”lighttpd”
lighttpd=”/usr/sbin/lighttpd”
RETVAL=0
start() {
echo -n $”Starting $prog: “
daemon $lighttpd -f $LIGHTTPD_CONF_PATH
RETVAL=$?
echo
[ $RETVAL -eq 0 ] && touch /var/lock/subsys/$prog
return $RETVAL
}
stop() {
echo -n $”Stopping $prog: “
killproc $lighttpd
killall php
RETVAL=$?
echo
[ $RETVAL -eq 0 ] && rm -f /var/lock/subsys/$prog
return $RETVAL
}
reload() {
echo -n $”Reloading $prog: “
killproc $lighttpd -HUP
killall php -HUP
RETVAL=$?
echo
return $RETVAL
}
case “$1” in
start)
start
;;
stop)
stop
;;
restart)
stop
start
;;
condrestart)
if [ -f /var/lock/subsys/$prog ]; then
stop
start
fi
;;
reload)
reload
;;
status)
status $lighttpd
RETVAL=$?
;;
*)
echo $”Usage: $0 {start|stop|restart|condrestart|reload|status}”
RETVAL=1
esac
exit $RETVAL
8.PHPの動作確認
1)起動する
①Slackware10の場合
# /etc/rc.d/rc.lighttpd start
②Nature’s Linux1.3の場合
# /etc/init.d/lighttpd start
2)プロセス確認
# ps -ef
省略
nobody 2369 1 0 14:32 ? 00:00:00 /usr/sbin/lighttpd -f /usr/local/etc/lighttpd.conf
nobody 2370 2369 0 14:32 ? 00:00:00 /usr/local/bin/php-cgi
nobody 2371 2370 0 14:32 ? 00:00:00 /usr/local/bin/php-cgi
nobody 2374 2369 0 14:32 ? 00:00:00 /usr/local/bin/php-cgi
nobody 2375 2374 0 14:32 ? 00:00:00 /usr/local/bin/php-cgi
nobody 2376 2369 0 14:32 ? 00:00:00 /usr/local/bin/php-cgi
nobody 2377 2376 0 14:32 ? 00:00:00 /usr/local/bin/php-cgi
nobody 2378 2369 0 14:32 ? 00:00:00 /usr/local/bin/php-cgi
nobody 2379 2378 0 14:32 ? 00:00:00 /usr/local/bin/php-cgi
nobody 2380 2369 0 14:32 ? 00:00:00 /usr/local/sbin/cronolog /usr/local/apache/logs/access_log
root 2382 2140 0 14:33 pts/1 00:00:00 ps -ef
3)PHPの動作確認
phpinfo.phpを作ってPHPの動作確認。
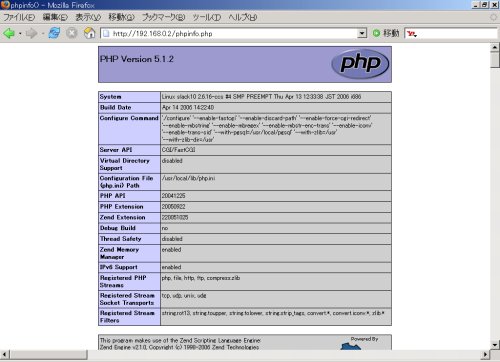
9.その他
1) バナー情報の比較
参考までに、apacheとのバナー情報の比較を以下に示す。見てもらえれば解るが、情報が少し異なっている。
以下は、lighttpdのデフォルト設定のバナー情報。
root@slack10:~# telnet www.kozupon.com http
Trying 203.141.144.180…
Connected to www.kozupon.com.
Escape character is ‘^]’.
GET / HTTP/1.0 ← 入力
<リターン>
HTTP/1.0 400 Bad Request
Connection: close
Content-Type: text/html
Content-Length: 349
Date: Thu, 27 Apr 2006 01:24:46 GMT
Server: lighttpd/1.4.11
<?xml version=”1.0″ encoding=”iso-8859-1″?>
<!DOCTYPE html PUBLIC “-//W3C//DTD XHTML 1.0 Transitional//EN”
“http://www.w3.org/TR/xhtml1/DTD/xhtml1-transitional.dtd”>
<html xmlns=”http://www.w3.org/1999/xhtml” xml:lang=”en” lang=”en”>
<head>
<title>400 – Bad Request</title>
</head>
<body>
<h1>400 – Bad Request</h1>
</body>
</html>
Connection closed by foreign host.
以下は、apacheのバナー情報。httpd.confのServerTokensセクションはosレベルに設定されている。
root@slack10:~# telnet www.xxxxxxxxxxxx.co.jp http
Trying 210.196.76.153…
Connected to www.xxxxxxxxxxxx.co.jp.
Escape character is ‘^]’.
GET / HTTP/1.0 ← 入力
<リターン>
HTTP/1.1 400 Bad Request
Date: Thu, 27 Apr 2006 00:57:31 GMT
Server: Apache/2.0.52 (White Box)
Content-Length: 320
Connection: close
Content-Type: text/html; charset=iso-8859-1
<!DOCTYPE HTML PUBLIC “-//IETF//DTD HTML 2.0//EN”>
<html><head>
<title>400 Bad Request</title>
</head><body>
<h1>Bad Request</h1>
<p>Your browser sent a request that this server could not understand.<br />
</p>
<hr>
<address>Apache/2.0.52 (White Box) Server at www.xxxxxxxxxxxx.co.jp Port 80</address>
</body></html>
Connection closed by foreign host.
2) 注意した方が良いこと
バグ等のパッチ処理として、phpのバージョンの最新ソースをインストールしたい場合は、lighttpdのソースも最新のものにしないと上手く動かないときがあるので、バージョンの整合性には注意すること。
■ DebianGNU/Linux4.0 etch編( LightTPD + PHP + Postgresql連携 )
DebianGNU/Linux4.0 etchのバイナリでlighttpdをインスコしてみた結果を掲載するlighttpdの他に以下をプラグインしてインスコ。
lighttpd+Postgresql7+PHP4
1.aptでパッケージダウンロードインスコ
wirehork:/# apt-get update
Get:1 http://ftp.dti.ad.jp etch Release.gpg [378B]
Hit http://ftp.dti.ad.jp etch Release
Ign http://ftp.dti.ad.jp etch/main Packages/DiffIndex
Ign http://ftp.dti.ad.jp etch/main Sources/DiffIndex
Hit http://ftp.dti.ad.jp etch/main Packages
Hit http://ftp.dti.ad.jp etch/main Sources
Get:2 http://security.debian.org etch/updates Release.gpg [189B]
Get:3 http://security.debian.org etch/updates Release [22.5kB]
Ign http://security.debian.org etch/updates/main Packages/DiffIndex
Ign http://security.debian.org etch/updates/contrib Packages/DiffIndex
Ign http://security.debian.org etch/updates/main Sources/DiffIndex
Ign http://security.debian.org etch/updates/contrib Sources/DiffIndex
Get:4 http://security.debian.org etch/updates/main Packages [113kB]
Hit http://security.debian.org etch/updates/contrib Packages
Get:5 http://security.debian.org etch/updates/main Sources [14.4kB]
Hit http://security.debian.org etch/updates/contrib Sources
Fetched 150kB in 3s (46.5kB/s)
Reading package lists… Done
wirehork:/# apt-get install php4 php4-common php4-cgi php4-pgsql postgresql libpcre3 zlib1g lighttpd lighttpd-doc
2.lighttpd.confの編集
wirehork:/# cd /etc/lighttpd
wirehork:/etc/lighttpd# vi lighttpd.conf
server.modules = (
”mod_access”,
”mod_setenv”,
”mod_auth”,
”mod_ssi”,
”mod_alias”,
”mod_accesslog”,
”mod_rewrite”,
”mod_redirect”,
”mod_status”,
”mod_evhost”,
”mod_compress”,
”mod_accesslog”,
”mod_fastcgi”
)
server.document-root = “/var/www/”
server.errorlog = “/var/log/lighttpd/error.log”
index-file.names = ( “index.php”, “index.html”, “index.htm”, “default.htm” )
accesslog.filename = “/var/log/lighttpd/access.log”
url.access-deny = ( “~”, “.inc” )
#server.port = 80
server.error-handler-404 = “/404.html”
server.pid-file = “/var/run/lighttpd.pid”
dir-listing.encoding = “utf-8”
server.dir-listing = “enable”
server.username = “www-data”
server.groupname = “www-data”
fastcgi.server = ( “.php” =>
( “localhost” =>
(
”socket” => “/tmp/php-fastcgi.socket”,
”bin-path” => “/usr/bin/php4-cgi”
)
),
”.php4″ =>
( “localhost” =>
(
”socket” => “/tmp/php-fastcgi.socket”,
”bin-path” => “/usr/bin/php4-cgi”
)
),
”.php3″ =>
( “localhost” =>
(
”socket” => “/tmp/php-fastcgi.socket”,
”bin-path” => “/usr/bin/php4-cgi”
)
)
)
$HTTP[“remoteip”] =~ “127.0.0.1” {
alias.url += (
“/doc/” => “/usr/share/doc/”,
“/images/” => “/usr/share/images/”
)
$HTTP[“url”] =~ “^/doc/|^/images/” {
dir-listing.activate = “enable”
}
}
include_shell “/usr/share/lighttpd/create-mime.assign.pl”
include_shell “/usr/share/lighttpd/include-conf-enabled.pl”
ssi.extension = ( “.shtml” )
3.起動スクリプトを覗く
wirehork:/etc/lighttpd# more /etc/init.d/lighttpd
#!/bin/sh
### BEGIN INIT INFO
# Provides: lighttpd
# Required-Start: networking
# Required-Stop: networking
# Default-Start: 2 3 4 5
# Default-Stop: 0 1 6
# Short-Description: Start the lighttpd web server.
### END INIT INFO
PATH=/sbin:/bin:/usr/sbin:/usr/bin
DAEMON=/usr/sbin/lighttpd
NAME=lighttpd
DESC=”web server”
PIDFILE=/var/run/$NAME.pid
SCRIPTNAME=/etc/init.d/$NAME
DAEMON_OPTS=”-f /etc/lighttpd/lighttpd.conf”
test -x $DAEMON || exit 0
set -e
. /lib/lsb/init-functions
case “$1” in
start)
log_daemon_msg “Starting $DESC” $NAME
if ! start-stop-daemon –start –quiet\
–pidfile $PIDFILE –exec $DAEMON — $DAEMON_OPTS ; then
log_end_msg 1
else
log_end_msg 0
fi
;;
stop)
log_daemon_msg “Stopping $DESC” $NAME
if start-stop-daemon –quiet –stop –oknodo –retry 30\
–pidfile $PIDFILE –exec $DAEMON; then
rm -f $PIDFILE
log_end_msg 0
else
log_end_msg 1
fi
;;
reload)
log_daemon_msg “Reloading $DESC configuration” $NAME
if start-stop-daemon –stop –signal 2 –oknodo –retry 30\
–quiet –pidfile $PIDFILE –exec $DAEMON; then
if start-stop-daemon –start –quiet \
–pidfile $PIDFILE –exec $DAEMON — $DAEMON_OPTS ; then
log_end_msg 0
else
log_end_msg 1
fi
else
log_end_msg 1
fi
;;
restart|force-reload)
$0 stop
[ -r $PIDFILE ] && while pidof lighttpd |\
grep -q `cat $PIDFILE 2>/dev/null` 2>/dev/null ; do sleep 1; do
ne
$0 start
;;
*)
echo “Usage: $SCRIPTNAME {start|stop|restart|reload|force-reload}” >&2
exit 1
;;
esac
exit 0
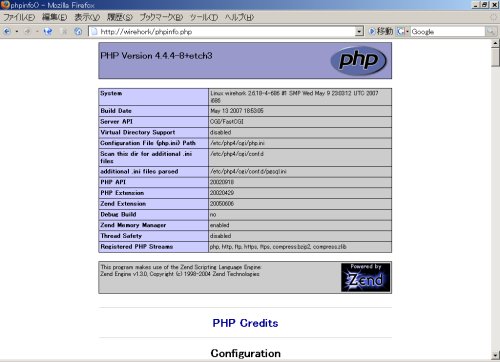
4.phpinfo画面の表示
インスコ後、phpinfo画面を表示させる。
■ Debian lennyでlighttpd+PHP5+MySQLを全てソースをビルドして動かす!
1.MySQL5.0をインスコする
1)MySQLダウンロードとリンク
MySQLオフィシャルサイト Linux (non RPM packages) downloads (platform notes) Linux (x86)で2008年8月現在 5.0系は、 mysql-5.0.67-linux-i686.tar.gz が最新のようです。
oss:~# cd /usr/local
oss:/usr/local# mkdir MySQL-5.0
oss:/usr/local# cd MySQL-5.0/
oss:/usr/local/MySQL-5.0# groupadd mysql
oss:/usr/local/MySQL-5.0# useradd -g mysql mysql
oss:/usr/local/MySQL-5.0# wget http://dev.mysql.com/get/Downloads/MySQL-5.0/
mysql-5.0.67-linux-i686.tar.gz/from/http://ftp.iij.ad.jp/pub/db/mysql/
–2008-08-25 20:43:20– http://dev.mysql.com/get/Downloads/MySQL-5.0/mysql-5.0.67-linux-
i686.tar.gz/from/http://ftp.iij.ad.jp/pub/db/mysql/
Resolving fifo… 192.168.0.12
Connecting to fifo|192.168.0.12|:8080… connected.
Proxy request sent, awaiting response… 302 Moved Temporarily
Location: http://ftp.iij.ad.jp/pub/db/mysql/Downloads/MySQL-5.0/mysql-5.0.67-linux-i686.tar.gz
[following]
–2008-08-25 20:43:22– http://ftp.iij.ad.jp/pub/db/mysql/Downloads/MySQL-5.0/
mysql-5.0.67-linux-i686.tar.gz
Connecting to fifo|192.168.0.12|:8080… connected.
Proxy request sent, awaiting response… 200 OK
Length: 102733467 (98M) [application/x-gzip]
Saving to: `mysql-5.0.67-linux-i686.tar.gz’
100%[======================================>] 102,733,467 2.29M/s in 35s
2008-08-25 20:43:57 (2.83 MB/s) – `mysql-5.0.67-linux-i686.tar.gz’ saved [102733467/102733467]
oss:/usr/local/MySQL-5.0# tar zxvf mysql-5.0.67-linux-i686.tar.gz
oss:/usr/local/MySQL-5.0# chown -R root.root mysql-5.0.67-linux-i686
oss:/usr/local/MySQL-5.0# cd ..
oss:/usr/local# ln -s MySQL-5.0/mysql-5.0.67-linux-i686 mysql
oss:/usr/local# cd mysql
2)イニシャライズDB
oss:/usr/local/mysql# scripts/mysql_install_db
Installing MySQL system tables…
080825 23:36:48 [Warning] option ‘thread_stack’: unsigned value 126976 adjusted to 131072
OK
Filling help tables…
080825 23:36:49 [Warning] option ‘thread_stack’: unsigned value 126976 adjusted to 131072
OK
To start mysqld at boot time you have to copy
support-files/mysql.server to the right place for your system
PLEASE REMEMBER TO SET A PASSWORD FOR THE MySQL root USER !
To do so, start the server, then issue the following commands:
./bin/mysqladmin -u root password ‘new-password’
./bin/mysqladmin -u root -h oss password ‘new-password’
Alternatively you can run:
./bin/mysql_secure_installation
which will also give you the option of removing the test
databases and anonymous user created by default. This is
strongly recommended for production servers.
See the manual for more instructions.
You can start the MySQL daemon with:
cd . ; ./bin/mysqld_safe &
You can test the MySQL daemon with mysql-test-run.pl
cd mysql-test ; perl mysql-test-run.pl
Please report any problems with the ./bin/mysqlbug script!
The latest information about MySQL is available on the web at
http://www.mysql.com
Support MySQL by buying support/licenses at http://shop.mysql.com
3)グループ&オーナー権限付与
oss:/usr/local/mysql# chown -R root /usr/local/mysql
oss:/usr/local/mysql# chown -R mysql /usr/local/mysql/data
oss:/usr/local/mysql# chgrp -R mysql /usr/local/mysql
oss:/usr/local/mysql# chown -R root /usr/local/mysql/bin
4)mysqlの起動
oss:/usr/local/mysql# /usr/local/mysql/bin/mysqld –user=mysql &
080825 23:38:46 [Warning] option ‘thread_stack’: unsigned value 126976 adjusted to 131072
[1] 11571
oss:/usr/local/mysql# InnoDB: The first specified data file ./ibdata1 did not exist:
InnoDB: a new database to be created!
080825 23:38:46 InnoDB: Setting file ./ibdata1 size to 10 MB
InnoDB: Database physically writes the file full: wait…
080825 23:38:48 InnoDB: Log file ./ib_logfile0 did not exist: new to be createdInnoDB: Setting log file
./ib_logfile0 size to 5 MB
InnoDB: Database physically writes the file full: wait…
080825 23:38:49 InnoDB: Log file ./ib_logfile1 did not exist: new to be createdInnoDB: Setting log file
./ib_logfile1 size to 5 MB
InnoDB: Database physically writes the file full: wait…
InnoDB: Doublewrite buffer not found: creating new
InnoDB: Doublewrite buffer created
InnoDB: Creating foreign key constraint system tables
InnoDB: Foreign key constraint system tables created
080825 23:38:52 InnoDB: Started; log sequence number 0 0
080825 23:38:52 [Note] /usr/local/mysql/bin/mysqld: ready for connections.
Version: ‘5.0.67’ socket: ‘/tmp/mysql.sock’ port: 3306 MySQL Community Server (GPL)
5)起動スクリプトの編集
oss:/usr/local/mysql# vi /etc/rc.local
省略
# mysql start
if [ -x /usr/local/mysql/bin/mysqld ]; then
/usr/local/mysql/bin/mysqld –user=mysql &
fi
省略
6)データベースの初期設定
□ルートユーザのパスワードの設定
oss:/usr/local/mysql# /usr/local/mysql/bin/mysql -u root -p
Enter password: ←エンター
Welcome to the MySQL monitor. Commands end with ; or \g.
Your MySQL connection id is 1
Server version: 5.0.67 MySQL Community Server (GPL)
Type ‘help;’ or ‘\h’ for help. Type ‘\c’ to clear the buffer.
mysql> SET PASSWORD FOR root@localhost = PASSWORD(‘xxxxxxxxxxxxxxxxx’);
Query OK, 0 rows affected (0.00 sec)
mysql> FLUSH PRIVILEGES;
Query OK, 0 rows affected (0.00 sec)
□スーパーユーザの作成(サーバへ接続できて何でもして構わないユーザ)
アカウント名は、「mity」で作成する。
mysql> GRANT ALL PRIVILEGES ON *.* TO mity@localhost IDENTIFIED BY ‘xxxxxxxx’ WITH GRANT OPTION;
Query OK, 0 rows affected (0.00 sec)
mysql> GRANT ALL PRIVILEGES ON *.* TO mity@”%” IDENTIFIED BY ‘xxxxxxxx’ WITH GRANT OPTION;
Query OK, 0 rows affected (0.00 sec)
mysql> FLUSH PRIVILEGES;
Query OK, 0 rows affected (0.00 sec)
mysql> quit
Bye
□P_blog用データベース作成
oss:/usr/local/mysql# /usr/local/mysql/bin/mysqladmin -u mity -p create oss_db
Enter password:xxxxxxxx
oss:/usr/local/mysql# /usr/local/mysql/bin/mysqlshow -u mity -p
Enter password:xxxxxxxx
+——————–+
| Databases |
+——————–+
| information_schema |
| mysql |
| oss_db |
| test |
+——————–+
2.lighttpd+PHP5のインスコ
1)Debianの開発環境を作る
□定番のアップデートチェック
note:~# apt-get -u update
Hit http://http.debian.or.jp lenny Release.gpg
Hit http://http.debian.or.jp lenny Release
Hit http://http.debian.or.jp lenny/main Packages/DiffIndex
Hit http://security.debian.org lenny/updates Release.gpg
Hit http://http.debian.or.jp lenny/contrib Packages/DiffIndex
Hit http://http.debian.or.jp lenny/non-free Packages/DiffIndex
Hit http://security.debian.org lenny/updates Release
Ign http://security.debian.org lenny/updates/main Packages/DiffIndex
Hit http://security.debian.org lenny/updates/main Packages
Reading package lists… Done
□Debianは、まずは開発環境を整えないとコンパイル&リンクが出来ないので気をつけること
note:~# apt-get install gcc g++ make automake libc6-dev
2)FastCGIのインスコ
■ ソースインストール編( LightTPD + PHP + Postgresql連携 )の1項のFastCGIのインストールを行う。
3)libpcreのインスコ
■ ソースインストール編( LightTPD + PHP + Postgresql連携 )の2項のlibpcreのインストールを行う。但し、2008年8月現在 pcre-7.7.tar.gz が最新であった。
4)phpのインスコ
まずは、phpに必要なものをインスコ
□zlib-1.2.3をインスコする
oss:/usr/local/src# wget http://www.zlib.net/zlib-1.2.3.tar.gz
–2008-08-26 01:44:05– http://www.zlib.net/zlib-1.2.3.tar.gz
Resolving fifo… 192.168.0.12
Connecting to fifo|192.168.0.12|:8080… connected.
Proxy request sent, awaiting response… 200 OK
Length: 496597 (485K) [application/x-tar]
Saving to: `zlib-1.2.3.tar.gz’
100%[======================================>] 496,597 –.-K/s in 0.05s
2008-08-26 01:44:05 (10.4 MB/s) – `zlib-1.2.3.tar.gz’ saved [496597/496597]
oss:/usr/local/src# tar zxvf zlib-1.2.3.tar.gz
zlib-1.2.3/
zlib-1.2.3/adler32.c
zlib-1.2.3/algorithm.txt
zlib-1.2.3/amiga/
zlib-1.2.3/amiga/Makefile.pup
zlib-1.2.3/amiga/Makefile.sas
zlib-1.2.3/as400/
zlib-1.2.3/as400/bndsrc
zlib-1.2.3/as400/compile.clp
zlib-1.2.3/as400/readme.txt
zlib-1.2.3/as400/zlib.inc
zlib-1.2.3/ChangeLog
zlib-1.2.3/compress.c
zlib-1.2.3/configure
zlib-1.2.3/contrib/
zlib-1.2.3/contrib/ada/
zlib-1.2.3/contrib/ada/buffer_demo.adb
zlib-1.2.3/contrib/ada/mtest.adb
zlib-1.2.3/contrib/ada/read.adb
zlib-1.2.3/contrib/ada/readme.txt
zlib-1.2.3/contrib/ada/test.adb
zlib-1.2.3/contrib/ada/zlib-streams.adb
zlib-1.2.3/contrib/ada/zlib-streams.ads
zlib-1.2.3/contrib/ada/zlib-thin.adb
zlib-1.2.3/contrib/ada/zlib-thin.ads
zlib-1.2.3/contrib/ada/zlib.adb
zlib-1.2.3/contrib/ada/zlib.ads
zlib-1.2.3/contrib/ada/zlib.gpr
zlib-1.2.3/contrib/asm586/
zlib-1.2.3/contrib/asm586/match.S
zlib-1.2.3/contrib/asm586/README.586
zlib-1.2.3/contrib/asm686/
zlib-1.2.3/contrib/asm686/match.S
zlib-1.2.3/contrib/asm686/README.686
zlib-1.2.3/contrib/blast/
zlib-1.2.3/contrib/blast/blast.c
zlib-1.2.3/contrib/blast/blast.h
zlib-1.2.3/contrib/blast/Makefile
zlib-1.2.3/contrib/blast/README
zlib-1.2.3/contrib/blast/test.pk
zlib-1.2.3/contrib/blast/test.txt
zlib-1.2.3/contrib/delphi/
zlib-1.2.3/contrib/delphi/readme.txt
zlib-1.2.3/contrib/delphi/ZLib.pas
zlib-1.2.3/contrib/delphi/ZLibConst.pas
zlib-1.2.3/contrib/delphi/zlibd32.mak
zlib-1.2.3/contrib/dotzlib/
zlib-1.2.3/contrib/dotzlib/DotZLib/
zlib-1.2.3/contrib/dotzlib/DotZLib/AssemblyInfo.cs
zlib-1.2.3/contrib/dotzlib/DotZLib/ChecksumImpl.cs
zlib-1.2.3/contrib/dotzlib/DotZLib/CircularBuffer.cs
zlib-1.2.3/contrib/dotzlib/DotZLib/CodecBase.cs
zlib-1.2.3/contrib/dotzlib/DotZLib/Deflater.cs
zlib-1.2.3/contrib/dotzlib/DotZLib/DotZLib.cs
zlib-1.2.3/contrib/dotzlib/DotZLib/DotZLib.csproj
zlib-1.2.3/contrib/dotzlib/DotZLib/GZipStream.cs
zlib-1.2.3/contrib/dotzlib/DotZLib/Inflater.cs
zlib-1.2.3/contrib/dotzlib/DotZLib/UnitTests.cs
zlib-1.2.3/contrib/dotzlib/DotZLib.build
zlib-1.2.3/contrib/dotzlib/DotZLib.chm
zlib-1.2.3/contrib/dotzlib/DotZLib.sln
zlib-1.2.3/contrib/dotzlib/LICENSE_1_0.txt
zlib-1.2.3/contrib/dotzlib/readme.txt
zlib-1.2.3/contrib/infback9/
zlib-1.2.3/contrib/infback9/infback9.c
zlib-1.2.3/contrib/infback9/infback9.h
zlib-1.2.3/contrib/infback9/inffix9.h
zlib-1.2.3/contrib/infback9/inflate9.h
zlib-1.2.3/contrib/infback9/inftree9.c
zlib-1.2.3/contrib/infback9/inftree9.h
zlib-1.2.3/contrib/infback9/README
zlib-1.2.3/contrib/inflate86/
zlib-1.2.3/contrib/inflate86/inffas86.c
zlib-1.2.3/contrib/inflate86/inffast.S
zlib-1.2.3/contrib/iostream/
zlib-1.2.3/contrib/iostream/test.cpp
zlib-1.2.3/contrib/iostream/zfstream.cpp
zlib-1.2.3/contrib/iostream/zfstream.h
zlib-1.2.3/contrib/iostream2/
zlib-1.2.3/contrib/iostream2/zstream.h
zlib-1.2.3/contrib/iostream2/zstream_test.cpp
zlib-1.2.3/contrib/iostream3/
zlib-1.2.3/contrib/iostream3/README
zlib-1.2.3/contrib/iostream3/test.cc
zlib-1.2.3/contrib/iostream3/TODO
zlib-1.2.3/contrib/iostream3/zfstream.cc
zlib-1.2.3/contrib/iostream3/zfstream.h
zlib-1.2.3/contrib/masm686/
zlib-1.2.3/contrib/masm686/match.asm
zlib-1.2.3/contrib/masmx64/
zlib-1.2.3/contrib/masmx64/bld_ml64.bat
zlib-1.2.3/contrib/masmx64/gvmat64.asm
zlib-1.2.3/contrib/masmx64/gvmat64.obj
zlib-1.2.3/contrib/masmx64/inffas8664.c
zlib-1.2.3/contrib/masmx64/inffasx64.asm
zlib-1.2.3/contrib/masmx64/inffasx64.obj
zlib-1.2.3/contrib/masmx64/readme.txt
zlib-1.2.3/contrib/masmx86/
zlib-1.2.3/contrib/masmx86/bld_ml32.bat
zlib-1.2.3/contrib/masmx86/gvmat32.asm
zlib-1.2.3/contrib/masmx86/gvmat32.obj
zlib-1.2.3/contrib/masmx86/gvmat32c.c
zlib-1.2.3/contrib/masmx86/inffas32.asm
zlib-1.2.3/contrib/masmx86/inffas32.obj
zlib-1.2.3/contrib/masmx86/mkasm.bat
zlib-1.2.3/contrib/masmx86/readme.txt
zlib-1.2.3/contrib/minizip/
zlib-1.2.3/contrib/minizip/ChangeLogUnzip
zlib-1.2.3/contrib/minizip/crypt.h
zlib-1.2.3/contrib/minizip/ioapi.c
zlib-1.2.3/contrib/minizip/ioapi.h
zlib-1.2.3/contrib/minizip/iowin32.c
zlib-1.2.3/contrib/minizip/iowin32.h
zlib-1.2.3/contrib/minizip/Makefile
zlib-1.2.3/contrib/minizip/miniunz.c
zlib-1.2.3/contrib/minizip/minizip.c
zlib-1.2.3/contrib/minizip/mztools.c
zlib-1.2.3/contrib/minizip/mztools.h
zlib-1.2.3/contrib/minizip/unzip.c
zlib-1.2.3/contrib/minizip/unzip.h
zlib-1.2.3/contrib/minizip/zip.c
zlib-1.2.3/contrib/minizip/zip.h
zlib-1.2.3/contrib/pascal/
zlib-1.2.3/contrib/pascal/example.pas
zlib-1.2.3/contrib/pascal/readme.txt
zlib-1.2.3/contrib/pascal/zlibd32.mak
zlib-1.2.3/contrib/pascal/zlibpas.pas
zlib-1.2.3/contrib/puff/
zlib-1.2.3/contrib/puff/Makefile
zlib-1.2.3/contrib/puff/puff.c
zlib-1.2.3/contrib/puff/puff.h
zlib-1.2.3/contrib/puff/README
zlib-1.2.3/contrib/puff/zeros.raw
zlib-1.2.3/contrib/README.contrib
zlib-1.2.3/contrib/testzlib/
zlib-1.2.3/contrib/testzlib/testzlib.c
zlib-1.2.3/contrib/testzlib/testzlib.txt
zlib-1.2.3/contrib/untgz/
zlib-1.2.3/contrib/untgz/Makefile
zlib-1.2.3/contrib/untgz/Makefile.msc
zlib-1.2.3/contrib/untgz/untgz.c
zlib-1.2.3/contrib/vstudio/
zlib-1.2.3/contrib/vstudio/readme.txt
zlib-1.2.3/contrib/vstudio/vc7/
zlib-1.2.3/contrib/vstudio/vc7/miniunz.vcproj
zlib-1.2.3/contrib/vstudio/vc7/minizip.vcproj
zlib-1.2.3/contrib/vstudio/vc7/testzlib.vcproj
zlib-1.2.3/contrib/vstudio/vc7/zlib.rc
zlib-1.2.3/contrib/vstudio/vc7/zlibstat.vcproj
zlib-1.2.3/contrib/vstudio/vc7/zlibvc.def
zlib-1.2.3/contrib/vstudio/vc7/zlibvc.sln
zlib-1.2.3/contrib/vstudio/vc7/zlibvc.vcproj
zlib-1.2.3/contrib/vstudio/vc8/
zlib-1.2.3/contrib/vstudio/vc8/miniunz.vcproj
zlib-1.2.3/contrib/vstudio/vc8/minizip.vcproj
zlib-1.2.3/contrib/vstudio/vc8/testzlib.vcproj
zlib-1.2.3/contrib/vstudio/vc8/testzlibdll.vcproj
zlib-1.2.3/contrib/vstudio/vc8/zlib.rc
zlib-1.2.3/contrib/vstudio/vc8/zlibstat.vcproj
zlib-1.2.3/contrib/vstudio/vc8/zlibvc.def
zlib-1.2.3/contrib/vstudio/vc8/zlibvc.sln
zlib-1.2.3/contrib/vstudio/vc8/zlibvc.vcproj
zlib-1.2.3/crc32.c
zlib-1.2.3/crc32.h
zlib-1.2.3/deflate.c
zlib-1.2.3/deflate.h
zlib-1.2.3/example.c
zlib-1.2.3/examples/
zlib-1.2.3/examples/fitblk.c
zlib-1.2.3/examples/gun.c
zlib-1.2.3/examples/gzappend.c
zlib-1.2.3/examples/gzjoin.c
zlib-1.2.3/examples/gzlog.c
zlib-1.2.3/examples/gzlog.h
zlib-1.2.3/examples/README.examples
zlib-1.2.3/examples/zlib_how.html
zlib-1.2.3/examples/zpipe.c
zlib-1.2.3/examples/zran.c
zlib-1.2.3/FAQ
zlib-1.2.3/gzio.c
zlib-1.2.3/INDEX
zlib-1.2.3/infback.c
zlib-1.2.3/inffast.c
zlib-1.2.3/inffast.h
zlib-1.2.3/inffixed.h
zlib-1.2.3/inflate.c
zlib-1.2.3/inflate.h
zlib-1.2.3/inftrees.c
zlib-1.2.3/inftrees.h
zlib-1.2.3/make_vms.com
zlib-1.2.3/Makefile
zlib-1.2.3/Makefile.in
zlib-1.2.3/minigzip.c
zlib-1.2.3/msdos/
zlib-1.2.3/msdos/Makefile.bor
zlib-1.2.3/msdos/Makefile.dj2
zlib-1.2.3/msdos/Makefile.emx
zlib-1.2.3/msdos/Makefile.msc
zlib-1.2.3/msdos/Makefile.tc
zlib-1.2.3/old/
zlib-1.2.3/old/descrip.mms
zlib-1.2.3/old/Makefile.riscos
zlib-1.2.3/old/os2/
zlib-1.2.3/old/os2/Makefile.os2
zlib-1.2.3/old/os2/zlib.def
zlib-1.2.3/old/README
zlib-1.2.3/old/visual-basic.txt
zlib-1.2.3/old/zlib.html
zlib-1.2.3/projects/
zlib-1.2.3/projects/README.projects
zlib-1.2.3/projects/visualc6/
zlib-1.2.3/projects/visualc6/example.dsp
zlib-1.2.3/projects/visualc6/minigzip.dsp
zlib-1.2.3/projects/visualc6/README.txt
zlib-1.2.3/projects/visualc6/zlib.dsp
zlib-1.2.3/projects/visualc6/zlib.dsw
zlib-1.2.3/qnx/
zlib-1.2.3/qnx/package.qpg
zlib-1.2.3/README
zlib-1.2.3/trees.c
zlib-1.2.3/trees.h
zlib-1.2.3/uncompr.c
zlib-1.2.3/win32/
zlib-1.2.3/win32/DLL_FAQ.txt
zlib-1.2.3/win32/Makefile.bor
zlib-1.2.3/win32/Makefile.emx
zlib-1.2.3/win32/Makefile.gcc
zlib-1.2.3/win32/Makefile.msc
zlib-1.2.3/win32/VisualC.txt
zlib-1.2.3/win32/zlib.def
zlib-1.2.3/win32/zlib1.rc
zlib-1.2.3/zconf.h
zlib-1.2.3/zconf.in.h
zlib-1.2.3/zlib.3
zlib-1.2.3/zlib.h
zlib-1.2.3/zutil.c
zlib-1.2.3/zutil.h
oss:/usr/local/src# chown -R root.root zlib-1.2.3
oss:/usr/local/src# cd zlib-1.2.3
oss:/usr/local/src/zlib-1.2.3# make install
cc -O -c -o adler32.o adler32.c
cc -O -c -o compress.o compress.c
cc -O -c -o crc32.o crc32.c
cc -O -c -o gzio.o gzio.c
cc -O -c -o uncompr.o uncompr.c
cc -O -c -o deflate.o deflate.c
cc -O -c -o trees.o trees.c
cc -O -c -o zutil.o zutil.c
cc -O -c -o inflate.o inflate.c
cc -O -c -o infback.o infback.c
cc -O -c -o inftrees.o inftrees.c
cc -O -c -o inffast.o inffast.c
ar rc libz.a adler32.o compress.o crc32.o gzio.o uncompr.o deflate.o trees.o zutil.o inflate.o infback.o
inftrees.o inffast.o
cp zlib.h zconf.h /usr/local/include
chmod 644 /usr/local/include/zlib.h /usr/local/include/zconf.h
cp libz.a /usr/local/lib
cd /usr/local/lib; chmod 755 libz.a
cd /usr/local/lib; if test -f libz.so.1.2.3; then \
rm -f libz.so libz.so.1; \
ln -s libz.so.1.2.3 libz.so; \
ln -s libz.so.1.2.3 libz.so.1; \
(ldconfig || true) >/dev/null 2>&1; \
fi
cp zlib.3 /usr/local/share/man/man3
chmod 644 /usr/local/share/man/man3/zlib.3
□libxml2-2.6.32をインスコする
php-5.2.6 を入れるためにlibxml2は、2008年月現在最新の libxml2-2.6.32 が必須みたいっす。
oss:/usr/local/src# wget ftp://xmlsoft.org/libxml2/libxml2-2.6.32.tar.gz
–2008-08-26 01:50:43– ftp://xmlsoft.org/libxml2/libxml2-2.6.32.tar.gz
Resolving fifo… 192.168.0.12
Connecting to fifo|192.168.0.12|:8080… connected.
Proxy request sent, awaiting response… 200 OK
Length: 4722227 (4.5M) [application/x-tar]
Saving to: `libxml2-2.6.32.tar.gz’
100%[======================================>] 4,722,227 222K/s in 22s
2008-08-26 01:51:09 (206 KB/s) – `libxml2-2.6.32.tar.gz’ saved [4722227/4722227]
oss:/usr/local/src# tar zxvf libxml2-2.6.32.tar.gz
oss:/usr/local/src# chown -R root.root libxml2-2.6.32
oss:/usr/local/src# cd libxml2-2.6.32
oss:/usr/local/src/libxml2-2.6.32# ./configure
checking build system type… i686-pc-linux-gnu
checking host system type… i686-pc-linux-gnu
checking for a BSD-compatible install… /usr/bin/install -c
checking whether build environment is sane… yes
checking for a thread-safe mkdir -p… /bin/mkdir -p
checking for gawk… no
checking for mawk… mawk
checking whether make sets $(MAKE)… yes
checking for gcc… gcc
checking for C compiler default output file name… a.out
checking whether the C compiler works… yes
checking whether we are cross compiling… no
checking for suffix of executables…
checking for suffix of object files… o
checking whether we are using the GNU C compiler… yes
checking whether gcc accepts -g… yes
checking for gcc option to accept ISO C89… none needed
checking for style of include used by make… GNU
checking dependency style of gcc… gcc3
checking for a BSD-compatible install… /usr/bin/install -c
checking how to run the C preprocessor… gcc -E
checking for rm… /bin/rm
checking for mv… /bin/mv
checking for tar… /bin/tar
checking for perl… /usr/bin/perl
checking for wget… /usr/bin/wget
checking for xmllint… /usr/bin/xmllint
checking for xsltproc… /usr/bin/xsltproc
checking for function prototypes… yes
checking for grep that handles long lines and -e… /bin/grep
checking for egrep… /bin/grep -E
checking for ANSI C header files… yes
checking for sys/types.h… yes
checking for sys/stat.h… yes
checking for stdlib.h… yes
checking for string.h… yes
checking for memory.h… yes
checking for strings.h… yes
checking for inttypes.h… yes
checking for stdint.h… yes
checking for unistd.h… yes
checking for string.h… (cached) yes
checking for a sed that does not truncate output… /bin/sed
checking for ld used by gcc… /usr/bin/ld
checking if the linker (/usr/bin/ld) is GNU ld… yes
checking for /usr/bin/ld option to reload object files… -r
checking for BSD-compatible nm… /usr/bin/nm -B
checking whether ln -s works… yes
checking how to recognize dependent libraries… pass_all
checking dlfcn.h usability… yes
checking dlfcn.h presence… yes
checking for dlfcn.h… yes
checking for g++… g++
checking whether we are using the GNU C++ compiler… yes
checking whether g++ accepts -g… yes
checking dependency style of g++… gcc3
checking how to run the C++ preprocessor… g++ -E
checking for g77… no
checking for xlf… no
checking for f77… no
checking for frt… no
checking for pgf77… no
checking for cf77… no
checking for fort77… no
checking for fl32… no
checking for af77… no
checking for xlf90… no
checking for f90… no
checking for pgf90… no
checking for pghpf… no
checking for epcf90… no
checking for gfortran… no
checking for g95… no
checking for xlf95… no
checking for f95… no
checking for fort… no
checking for ifort… no
checking for ifc… no
checking for efc… no
checking for pgf95… no
checking for lf95… no
checking for ftn… no
checking whether we are using the GNU Fortran 77 compiler… no
checking whether accepts -g… no
checking the maximum length of command line arguments… 98304
checking command to parse /usr/bin/nm -B output from gcc object… ok
checking for objdir… .libs
checking for ar… ar
checking for ranlib… ranlib
checking for strip… strip
checking if gcc supports -fno-rtti -fno-exceptions… no
checking for gcc option to produce PIC… -fPIC
checking if gcc PIC flag -fPIC works… yes
checking if gcc static flag -static works… yes
checking if gcc supports -c -o file.o… yes
checking whether the gcc linker (/usr/bin/ld) supports shared libraries… yes
checking whether -lc should be explicitly linked in… no
checking dynamic linker characteristics… GNU/Linux ld.so
checking how to hardcode library paths into programs… immediate
checking whether stripping libraries is possible… yes
checking if libtool supports shared libraries… yes
checking whether to build shared libraries… yes
checking whether to build static libraries… yes
configure: creating libtool
appending configuration tag “CXX” to libtool
checking for ld used by g++… /usr/bin/ld
checking if the linker (/usr/bin/ld) is GNU ld… yes
checking whether the g++ linker (/usr/bin/ld) supports shared libraries… yes
checking for g++ option to produce PIC… -fPIC
checking if g++ PIC flag -fPIC works… yes
checking if g++ static flag -static works… yes
checking if g++ supports -c -o file.o… yes
checking whether the g++ linker (/usr/bin/ld) supports shared libraries… yes
checking dynamic linker characteristics… GNU/Linux ld.so
checking how to hardcode library paths into programs… immediate
appending configuration tag “F77” to libtool
Checking zlib
checking zlib.h usability… yes
checking zlib.h presence… yes
checking for zlib.h… yes
checking for gzread in -lz… yes
Checking headers
checking for dirent.h that defines DIR… yes
checking for library containing opendir… none required
checking for ANSI C header files… (cached) yes
checking fcntl.h usability… yes
checking fcntl.h presence… yes
checking for fcntl.h… yes
checking for unistd.h… (cached) yes
checking ctype.h usability… yes
checking ctype.h presence… yes
checking for ctype.h… yes
checking dirent.h usability… yes
checking dirent.h presence… yes
checking for dirent.h… yes
checking errno.h usability… yes
checking errno.h presence… yes
checking for errno.h… yes
checking malloc.h usability… yes
checking malloc.h presence… yes
checking for malloc.h… yes
checking stdarg.h usability… yes
checking stdarg.h presence… yes
checking for stdarg.h… yes
checking for sys/stat.h… (cached) yes
checking for sys/types.h… (cached) yes
checking time.h usability… yes
checking time.h presence… yes
checking for time.h… yes
checking ansidecl.h usability… no
checking ansidecl.h presence… no
checking for ansidecl.h… no
checking ieeefp.h usability… no
checking ieeefp.h presence… no
checking for ieeefp.h… no
checking nan.h usability… no
checking nan.h presence… no
checking for nan.h… no
checking math.h usability… yes
checking math.h presence… yes
checking for math.h… yes
checking limits.h usability… yes
checking limits.h presence… yes
checking for limits.h… yes
checking fp_class.h usability… no
checking fp_class.h presence… no
checking for fp_class.h… no
checking float.h usability… yes
checking float.h presence… yes
checking for float.h… yes
checking for stdlib.h… (cached) yes
checking for sys/socket.h… yes
checking for netinet/in.h… yes
checking for arpa/inet.h… yes
checking netdb.h usability… yes
checking netdb.h presence… yes
checking for netdb.h… yes
checking sys/time.h usability… yes
checking sys/time.h presence… yes
checking for sys/time.h… yes
checking sys/select.h usability… yes
checking sys/select.h presence… yes
checking for sys/select.h… yes
checking sys/mman.h usability… yes
checking sys/mman.h presence… yes
checking for sys/mman.h… yes
checking sys/timeb.h usability… yes
checking sys/timeb.h presence… yes
checking for sys/timeb.h… yes
checking signal.h usability… yes
checking signal.h presence… yes
checking for signal.h… yes
checking for arpa/nameser.h… yes
checking for resolv.h… yes
checking dl.h usability… no
checking dl.h presence… no
checking for dl.h… no
checking for dlfcn.h… (cached) yes
Checking libraries
checking for strftime… yes
checking for strdup… yes
checking for strndup… yes
checking for strerror… yes
checking for finite… yes
checking for isnand… no
checking for fp_class… no
checking for class… no
checking for fpclass… no
checking for strftime… (cached) yes
checking for localtime… yes
checking for gettimeofday… yes
checking for ftime… yes
checking for stat… yes
checking for _stat… no
checking for signal… yes
checking for printf… yes
checking for sprintf… yes
checking for fprintf… yes
checking for snprintf… yes
checking for vfprintf… yes
checking for vsprintf… yes
checking for vsnprintf… yes
checking for sscanf… yes
checking for va_copy… yes
checking for library containing gethostent… none required
checking for library containing setsockopt… none required
checking for library containing connect… none required
checking for type of socket length (socklen_t)… socklen_t *
checking whether to enable IPv6… yes
checking struct sockaddr::ss_family… yes
checking for getaddrinfo… yes
checking for isnan… yes
checking for isinf… yes
checking for python… /usr/bin/python
Found Python version 2.5
could not find python2.5/Python.h
checking for shl_load… no
checking for shl_load in -ldld… no
checking for dlopen… no
checking for dlopen in -ldl… yes
Checking configuration requirements
Enabling multithreaded support
checking pthread.h usability… yes
checking pthread.h presence… yes
checking for pthread.h… yes
checking for pthread_join in -lpthread… yes
checking iconv.h usability… yes
checking iconv.h presence… yes
checking for iconv.h… yes
checking for iconv… yes
checking for iconv declaration…
extern size_t iconv (iconv_t cd, char * *inbuf, size_t *inbytesleft, char * *outbuf, size_t *outbytesleft);
Enabled Schematron support
Enabled Schemas/Relax-NG support
configure: creating ./config.status
config.status: creating libxml2.spec
config.status: creating Makefile
config.status: creating include/Makefile
config.status: creating include/libxml/Makefile
config.status: creating doc/Makefile
config.status: creating doc/examples/Makefile
config.status: creating doc/devhelp/Makefile
config.status: creating example/Makefile
config.status: creating python/Makefile
config.status: creating python/tests/Makefile
config.status: creating xstc/Makefile
config.status: creating include/libxml/xmlversion.h
config.status: creating xml2-config
config.status: creating libxml-2.0.pc
config.status: creating libxml-2.0-uninstalled.pc
config.status: creating python/setup.py
config.status: creating config.h
config.status: executing depfiles commands
Done configuring
oss:/usr/local/src/libxml2-2.6.32# make
oss:/usr/local/src/libxml2-2.6.32# make test
oss:/usr/local/src/libxml2-2.6.32# make install
oss:/usr/local/src# wget http://jp2.php.net/get/php-5.2.6.tar.gz/from/this/mirror
oss:/usr/local/src# tar zxvf php-5.2.6.tar.gz
oss:/usr/local/src# chown -R root.root php-5.2.6
oss:/usr/local/src# cd php-5.2.6
oss:/usr/local/src/php-5.2.6# ./configure –enable-fastcgi –enable-discard-path
–enable-force-cgi-redirect –enable-mbstring –enable-mbregex –with-zlib-dir=/usr
–with-mysql=/usr/local/mysql
省略
creating scripts/php-config
creating scripts/man1/php-config.1
creating sapi/cli/php.1
creating main/php_config.h
creating main/internal_functions.c
creating main/internal_functions_cli.c
+——————————————————————–+
| License: |
| This software is subject to the PHP License, available in this |
| distribution in the file LICENSE. By continuing this installation |
| process, you are bound by the terms of this license agreement. |
| If you do not agree with the terms of this license, you must abort |
| the installation process at this point. |
+——————————————————————–+
Thank you for using PHP.
oss:/usr/local/src/php-5.2.6# make
oss:/usr/local/src/php-5.2.6# make install
Installing PHP SAPI module: cgi
Installing PHP CGI binary: /usr/local/bin/
Installing PHP CLI binary: /usr/local/bin/
Installing PHP CLI man page: /usr/local/man/man1/
Installing build environment: /usr/local/lib/php/build/
Installing header files: /usr/local/include/php/
Installing helper programs: /usr/local/bin/
program: phpize
program: php-config
Installing man pages: /usr/local/man/man1/
page: phpize.1
page: php-config.1
Installing PEAR environment: /usr/local/lib/php/
[PEAR] Console_Getopt – installed: 1.2.3
[PEAR] Archive_Tar – installed: 1.3.2
[PEAR] Structures_Graph- installed: 1.0.2
pear/PEAR can optionally use package “pear/XML_RPC” (version >= 1.4.0)
[PEAR] PEAR – installed: 1.7.1
Wrote PEAR system config file at: /usr/local/etc/pear.conf
You may want to add: /usr/local/lib/php to your php.ini include_path
Installing PDO headers: /usr/local/include/php/ext/pdo/
oss:/usr/local/src/php-5.2.6# cp php.ini-dist /usr/local/lib/php.ini
oss:/usr/local/src/php-5.2.6# vi /usr/local/lib/php.ini
省略
; Whether or not to register the EGPCS variables as global variables. You may
; want to turn this off if you don’t want to clutter your scripts’ global scope
; with user data. This makes most sense when coupled with track_vars – in which
; case you can access all of the GPC variables through the $HTTP_*_VARS[],
; variables.
;
; You should do your best to write your scripts so that they do not require
; register_globals to be on; Using form variables as globals can easily lead
; to possible security problems, if the code is not very well thought of.
register_globals = On
省略
5)cronologのインスコ
■ ソースインストール編( LightTPD + PHP + Postgresql連携 )の4項のcronologのインストールを行う。但し、2008年8月現在 cronolog-1.6.2.tar.gz が最新であった。
6)lighttpdのインスコ
□ビルド
■ ソースインストール編( LightTPD + PHP + Postgresql連携 )の5項のlighttpdのインストールを行う。但し、2008年8月現在 lighttpd-1.4.19.tar.gz が最新であった。
oss:/usr/local/src# wget http://www.lighttpd.net/download/lighttpd-1.4.19.tar.gz
–2008-08-26 23:14:44– http://www.lighttpd.net/download/lighttpd-1.4.19.tar.gzResolving
fifo… 192.168.0.12
Connecting to fifo|192.168.0.12|:8080… connected.
Proxy request sent, awaiting response… 200 OK
Length: 815568 (796K) [applicatio¥n/octet-stream]
Saving to: `lighttpd-1.4.19.tar.gz’
100%[======================================>] 815,568 241K/s in 3.3s
2008-08-26 23:14:48 (241 KB/s) – `lighttpd-1.4.19.tar.gz’ saved [815568/815568]
oss:/usr/local/src# tar zxvf lighttpd-1.4.19.tar.gz
lighttpd-1.4.19/
lighttpd-1.4.19/README
lighttpd-1.4.19/configure.in
lighttpd-1.4.19/aclocal.m4
lighttpd-1.4.19/Makefile.am
lighttpd-1.4.19/Makefile.in
lighttpd-1.4.19/config.h.in
lighttpd-1.4.19/distribute.sh.in
lighttpd-1.4.19/lighttpd.spec.in
lighttpd-1.4.19/configure
lighttpd-1.4.19/AUTHORS
lighttpd-1.4.19/COPYING
lighttpd-1.4.19/ChangeLog
lighttpd-1.4.19/INSTALL
lighttpd-1.4.19/NEWS
lighttpd-1.4.19/compile
lighttpd-1.4.19/config.guess
lighttpd-1.4.19/config.sub
lighttpd-1.4.19/depcomp
lighttpd-1.4.19/install-sh
lighttpd-1.4.19/ltmain.sh
lighttpd-1.4.19/missing
lighttpd-1.4.19/lighttpd.spec
lighttpd-1.4.19/autogen.sh
lighttpd-1.4.19/SConstruct
lighttpd-1.4.19/src/
lighttpd-1.4.19/src/server.h
lighttpd-1.4.19/src/buffer.h
lighttpd-1.4.19/src/network.h
lighttpd-1.4.19/src/log.h
lighttpd-1.4.19/src/keyvalue.h
lighttpd-1.4.19/src/response.h
lighttpd-1.4.19/src/request.h
lighttpd-1.4.19/src/fastcgi.h
lighttpd-1.4.19/src/chunk.h
lighttpd-1.4.19/src/settings.h
lighttpd-1.4.19/src/http_chunk.h
lighttpd-1.4.19/src/http_auth_digest.h
lighttpd-1.4.19/src/md5.h
lighttpd-1.4.19/src/http_auth.h
lighttpd-1.4.19/src/stream.h
lighttpd-1.4.19/src/fdevent.h
lighttpd-1.4.19/src/connections.h
lighttpd-1.4.19/src/base.h
lighttpd-1.4.19/src/stat_cache.h
lighttpd-1.4.19/src/plugin.h
lighttpd-1.4.19/src/mod_auth.h
lighttpd-1.4.19/src/etag.h
lighttpd-1.4.19/src/joblist.h
lighttpd-1.4.19/src/array.h
lighttpd-1.4.19/src/crc32.h
lighttpd-1.4.19/src/network_backends.h
lighttpd-1.4.19/src/configfile.h
lighttpd-1.4.19/src/bitset.h
lighttpd-1.4.19/src/mod_ssi.h
lighttpd-1.4.19/src/mod_ssi_expr.h
lighttpd-1.4.19/src/inet_ntop_cache.h
lighttpd-1.4.19/src/configparser.h
lighttpd-1.4.19/src/mod_ssi_exprparser.h
lighttpd-1.4.19/src/sys-mmap.h
lighttpd-1.4.19/src/sys-socket.h
lighttpd-1.4.19/src/mod_cml.h
lighttpd-1.4.19/src/mod_cml_funcs.h
lighttpd-1.4.19/src/splaytree.h
lighttpd-1.4.19/src/proc_open.h
lighttpd-1.4.19/src/status_counter.h
lighttpd-1.4.19/src/mod_magnet_cache.h
lighttpd-1.4.19/src/Makefile.am
lighttpd-1.4.19/src/Makefile.in
lighttpd-1.4.19/src/buffer.c
lighttpd-1.4.19/src/log.c
lighttpd-1.4.19/src/keyvalue.c
lighttpd-1.4.19/src/chunk.c
lighttpd-1.4.19/src/http_chunk.c
lighttpd-1.4.19/src/stream.c
lighttpd-1.4.19/src/fdevent.c
lighttpd-1.4.19/src/stat_cache.c
lighttpd-1.4.19/src/plugin.c
lighttpd-1.4.19/src/joblist.c
lighttpd-1.4.19/src/etag.c
lighttpd-1.4.19/src/array.c
lighttpd-1.4.19/src/data_string.c
lighttpd-1.4.19/src/data_count.c
lighttpd-1.4.19/src/data_array.c
lighttpd-1.4.19/src/data_integer.c
lighttpd-1.4.19/src/md5.c
lighttpd-1.4.19/src/data_fastcgi.c
lighttpd-1.4.19/src/fdevent_select.c
lighttpd-1.4.19/src/fdevent_linux_rtsig.c
lighttpd-1.4.19/src/fdevent_poll.c
lighttpd-1.4.19/src/fdevent_linux_sysepoll.c
lighttpd-1.4.19/src/fdevent_solaris_devpoll.c
lighttpd-1.4.19/src/fdevent_freebsd_kqueue.c
lighttpd-1.4.19/src/data_config.c
lighttpd-1.4.19/src/bitset.c
lighttpd-1.4.19/src/inet_ntop_cache.c
lighttpd-1.4.19/src/crc32.c
lighttpd-1.4.19/src/connections-glue.c
lighttpd-1.4.19/src/configfile-glue.c
lighttpd-1.4.19/src/http-header-glue.c
lighttpd-1.4.19/src/network_write.c
lighttpd-1.4.19/src/network_linux_sendfile.c
lighttpd-1.4.19/src/network_freebsd_sendfile.c
lighttpd-1.4.19/src/network_writev.c
lighttpd-1.4.19/src/network_solaris_sendfilev.c
lighttpd-1.4.19/src/network_openssl.c
lighttpd-1.4.19/src/splaytree.c
lighttpd-1.4.19/src/status_counter.c
lighttpd-1.4.19/src/mod_access.c
lighttpd-1.4.19/src/mod_accesslog.c
lighttpd-1.4.19/src/mod_alias.c
lighttpd-1.4.19/src/mod_auth.c
lighttpd-1.4.19/src/http_auth_digest.c
lighttpd-1.4.19/src/http_auth.c
lighttpd-1.4.19/src/mod_cgi.c
lighttpd-1.4.19/src/mod_cml.c
lighttpd-1.4.19/src/mod_cml_lua.c
lighttpd-1.4.19/src/mod_cml_funcs.c
lighttpd-1.4.19/src/mod_compress.c
lighttpd-1.4.19/src/mod_dirlisting.c
lighttpd-1.4.19/src/mod_evasive.c
lighttpd-1.4.19/src/mod_evhost.c
lighttpd-1.4.19/src/mod_expire.c
lighttpd-1.4.19/src/mod_extforward.c
lighttpd-1.4.19/src/mod_fastcgi.c
lighttpd-1.4.19/src/mod_flv_streaming.c
lighttpd-1.4.19/src/mod_indexfile.c
lighttpd-1.4.19/src/mod_magnet.c
lighttpd-1.4.19/src/mod_magnet_cache.c
lighttpd-1.4.19/src/mod_mysql_vhost.c
lighttpd-1.4.19/src/mod_proxy.c
lighttpd-1.4.19/src/mod_redirect.c
lighttpd-1.4.19/src/mod_rewrite.c
lighttpd-1.4.19/src/mod_rrdtool.c
lighttpd-1.4.19/src/mod_scgi.c
lighttpd-1.4.19/src/mod_secure_download.c
lighttpd-1.4.19/src/mod_setenv.c
lighttpd-1.4.19/src/mod_simple_vhost.c
lighttpd-1.4.19/src/mod_ssi_exprparser.c
lighttpd-1.4.19/src/mod_ssi_expr.c
lighttpd-1.4.19/src/mod_ssi.c
lighttpd-1.4.19/src/mod_staticfile.c
lighttpd-1.4.19/src/mod_status.c
lighttpd-1.4.19/src/mod_trigger_b4_dl.c
lighttpd-1.4.19/src/mod_userdir.c
lighttpd-1.4.19/src/mod_usertrack.c
lighttpd-1.4.19/src/mod_webdav.c
lighttpd-1.4.19/src/lemon.c
lighttpd-1.4.19/src/server.c
lighttpd-1.4.19/src/response.c
lighttpd-1.4.19/src/connections.c
lighttpd-1.4.19/src/network.c
lighttpd-1.4.19/src/configfile.c
lighttpd-1.4.19/src/configparser.c
lighttpd-1.4.19/src/request.c
lighttpd-1.4.19/src/proc_open.c
lighttpd-1.4.19/src/lighttpd-angel.c
lighttpd-1.4.19/src/spawn-fcgi.c
lighttpd-1.4.19/src/mod_skeleton.c
lighttpd-1.4.19/src/configparser.y
lighttpd-1.4.19/src/mod_ssi_exprparser.y
lighttpd-1.4.19/src/lempar.c
lighttpd-1.4.19/src/SConscript
lighttpd-1.4.19/doc/
lighttpd-1.4.19/doc/lighttpd.1
lighttpd-1.4.19/doc/spawn-fcgi.1
lighttpd-1.4.19/doc/Makefile.am
lighttpd-1.4.19/doc/Makefile.in
lighttpd-1.4.19/doc/lighttpd.conf
lighttpd-1.4.19/doc/lighttpd.user
lighttpd-1.4.19/doc/rc.lighttpd
lighttpd-1.4.19/doc/rc.lighttpd.redhat
lighttpd-1.4.19/doc/sysconfig.lighttpd
lighttpd-1.4.19/doc/rrdtool-graph.sh
lighttpd-1.4.19/doc/state.dot
lighttpd-1.4.19/doc/fastcgi-state.dot
lighttpd-1.4.19/doc/spawn-php.sh
lighttpd-1.4.19/doc/newstyle.css
lighttpd-1.4.19/doc/oldstyle.css
lighttpd-1.4.19/doc/accesslog.txt
lighttpd-1.4.19/doc/authentication.txt
lighttpd-1.4.19/doc/cgi.txt
lighttpd-1.4.19/doc/compress.txt
lighttpd-1.4.19/doc/configuration.txt
lighttpd-1.4.19/doc/extforward.txt
lighttpd-1.4.19/doc/fastcgi-state.txt
lighttpd-1.4.19/doc/fastcgi.txt
lighttpd-1.4.19/doc/features.txt
lighttpd-1.4.19/doc/performance.txt
lighttpd-1.4.19/doc/plugins.txt
lighttpd-1.4.19/doc/proxy.txt
lighttpd-1.4.19/doc/redirect.txt
lighttpd-1.4.19/doc/rewrite.txt
lighttpd-1.4.19/doc/secdownload.txt
lighttpd-1.4.19/doc/security.txt
lighttpd-1.4.19/doc/simple-vhost.txt
lighttpd-1.4.19/doc/skeleton.txt
lighttpd-1.4.19/doc/ssi.txt
lighttpd-1.4.19/doc/ssl.txt
lighttpd-1.4.19/doc/state.txt
lighttpd-1.4.19/doc/rrdtool.txt
lighttpd-1.4.19/doc/alias.txt
lighttpd-1.4.19/doc/userdir.txt
lighttpd-1.4.19/doc/mysqlvhost.txt
lighttpd-1.4.19/doc/access.txt
lighttpd-1.4.19/doc/traffic-shaping.txt
lighttpd-1.4.19/doc/setenv.txt
lighttpd-1.4.19/doc/status.txt
lighttpd-1.4.19/doc/scgi.txt
lighttpd-1.4.19/doc/cml.txt
lighttpd-1.4.19/doc/trigger_b4_dl.txt
lighttpd-1.4.19/doc/webdav.txt
lighttpd-1.4.19/doc/expire.txt
lighttpd-1.4.19/doc/dirlisting.txt
lighttpd-1.4.19/doc/evhost.txt
lighttpd-1.4.19/doc/magnet.txt
lighttpd-1.4.19/tests/
lighttpd-1.4.19/tests/Makefile.am
lighttpd-1.4.19/tests/Makefile.in
lighttpd-1.4.19/tests/fcgi-auth.c
lighttpd-1.4.19/tests/fcgi-responder.c
lighttpd-1.4.19/tests/wrapper.sh
lighttpd-1.4.19/tests/lighttpd.conf
lighttpd-1.4.19/tests/lighttpd.user
lighttpd-1.4.19/tests/lighttpd.htpasswd
lighttpd-1.4.19/tests/SConscript
lighttpd-1.4.19/tests/fastcgi-10.conf
lighttpd-1.4.19/tests/fastcgi-auth.conf
lighttpd-1.4.19/tests/fastcgi-responder.conf
lighttpd-1.4.19/tests/fastcgi-13.conf
lighttpd-1.4.19/tests/bug-06.conf
lighttpd-1.4.19/tests/bug-12.conf
lighttpd-1.4.19/tests/core-var-include.t
lighttpd-1.4.19/tests/var-include.conf
lighttpd-1.4.19/tests/var-include-sub.conf
lighttpd-1.4.19/tests/condition.conf
lighttpd-1.4.19/tests/core-condition.t
lighttpd-1.4.19/tests/core-request.t
lighttpd-1.4.19/tests/core-response.t
lighttpd-1.4.19/tests/core-keepalive.t
lighttpd-1.4.19/tests/core.t
lighttpd-1.4.19/tests/mod-proxy.t
lighttpd-1.4.19/tests/proxy.conf
lighttpd-1.4.19/tests/mod-secdownload.t
lighttpd-1.4.19/tests/mod-access.t
lighttpd-1.4.19/tests/mod-auth.t
lighttpd-1.4.19/tests/mod-cgi.t
lighttpd-1.4.19/tests/mod-compress.t
lighttpd-1.4.19/tests/mod-fastcgi.t
lighttpd-1.4.19/tests/mod-redirect.t
lighttpd-1.4.19/tests/mod-rewrite.t
lighttpd-1.4.19/tests/mod-userdir.t
lighttpd-1.4.19/tests/env-variables.t
lighttpd-1.4.19/tests/env-variables.conf
lighttpd-1.4.19/tests/symlink.t
lighttpd-1.4.19/tests/request.t
lighttpd-1.4.19/tests/mod-ssi.t
lighttpd-1.4.19/tests/LightyTest.pm
lighttpd-1.4.19/tests/mod-setenv.t
lighttpd-1.4.19/tests/lowercase.t
lighttpd-1.4.19/tests/lowercase.conf
lighttpd-1.4.19/tests/cachable.t
lighttpd-1.4.19/tests/core-404-handler.t
lighttpd-1.4.19/tests/404-handler.conf
lighttpd-1.4.19/tests/prepare.sh
lighttpd-1.4.19/tests/run-tests.pl
lighttpd-1.4.19/tests/cleanup.sh
lighttpd-1.4.19/tests/docroot/
lighttpd-1.4.19/tests/docroot/Makefile.am
lighttpd-1.4.19/tests/docroot/Makefile.in
lighttpd-1.4.19/tests/docroot/123/
lighttpd-1.4.19/tests/docroot/123/Makefile.am
lighttpd-1.4.19/tests/docroot/123/Makefile.in
lighttpd-1.4.19/tests/docroot/123/12345.html
lighttpd-1.4.19/tests/docroot/123/12345.txt
lighttpd-1.4.19/tests/docroot/123/dummyfile.bla
lighttpd-1.4.19/tests/docroot/123/phpinfo.php
lighttpd-1.4.19/tests/docroot/www/
lighttpd-1.4.19/tests/docroot/www/Makefile.am
lighttpd-1.4.19/tests/docroot/www/Makefile.in
lighttpd-1.4.19/tests/docroot/www/cgi.php
lighttpd-1.4.19/tests/docroot/www/cgi.pl
lighttpd-1.4.19/tests/docroot/www/dummydir/
lighttpd-1.4.19/tests/docroot/www/index.html
lighttpd-1.4.19/tests/docroot/www/index.txt
lighttpd-1.4.19/tests/docroot/www/phpinfo.php
lighttpd-1.4.19/tests/docroot/www/redirect.php
lighttpd-1.4.19/tests/docroot/www/cgi-pathinfo.pl
lighttpd-1.4.19/tests/docroot/www/get-env.php
lighttpd-1.4.19/tests/docroot/www/get-server-env.php
lighttpd-1.4.19/tests/docroot/www/nph-status.pl
lighttpd-1.4.19/tests/docroot/www/prefix.fcgi
lighttpd-1.4.19/tests/docroot/www/get-header.pl
lighttpd-1.4.19/tests/docroot/www/ssi.shtml
lighttpd-1.4.19/tests/docroot/www/get-post-len.pl
lighttpd-1.4.19/tests/docroot/www/exec-date.shtml
lighttpd-1.4.19/tests/docroot/www/index.html~
lighttpd-1.4.19/tests/docroot/www/404.fcgi
lighttpd-1.4.19/tests/docroot/www/404.html
lighttpd-1.4.19/tests/docroot/www/404.pl
lighttpd-1.4.19/tests/docroot/www/send404.pl
lighttpd-1.4.19/tests/docroot/www/crlfcrash.pl
lighttpd-1.4.19/tests/docroot/www/go/
lighttpd-1.4.19/tests/docroot/www/go/Makefile.am
lighttpd-1.4.19/tests/docroot/www/go/Makefile.in
lighttpd-1.4.19/tests/docroot/www/go/cgi.php
lighttpd-1.4.19/tests/docroot/www/indexfile/
lighttpd-1.4.19/tests/docroot/www/indexfile/Makefile.am
lighttpd-1.4.19/tests/docroot/www/indexfile/Makefile.in
lighttpd-1.4.19/tests/docroot/www/indexfile/index.php
lighttpd-1.4.19/tests/docroot/www/indexfile/return-404.php
lighttpd-1.4.19/tests/docroot/www/indexfile/rewrite.php
lighttpd-1.4.19/tests/docroot/www/expire/
lighttpd-1.4.19/tests/docroot/www/expire/Makefile.am
lighttpd-1.4.19/tests/docroot/www/expire/Makefile.in
lighttpd-1.4.19/tests/docroot/www/expire/access.txt
lighttpd-1.4.19/tests/docroot/www/expire/modification.txt
lighttpd-1.4.19/cygwin/
lighttpd-1.4.19/cygwin/Makefile.am
lighttpd-1.4.19/cygwin/Makefile.in
lighttpd-1.4.19/cygwin/lighttpd.README.in
lighttpd-1.4.19/cygwin/lighttpd.README
lighttpd-1.4.19/cygwin/setup.hint
lighttpd-1.4.19/openwrt/
lighttpd-1.4.19/openwrt/Makefile.am
lighttpd-1.4.19/openwrt/Makefile.in
lighttpd-1.4.19/openwrt/control.in
lighttpd-1.4.19/openwrt/lighttpd.mk.in
lighttpd-1.4.19/openwrt/conffiles
lighttpd-1.4.19/openwrt/control
lighttpd-1.4.19/openwrt/lighttpd.conf
lighttpd-1.4.19/openwrt/S51lighttpd
lighttpd-1.4.19/openwrt/lighttpd.mk
oss:/usr/local/src# chown -R root.root lighttpd-1.4.19
configureの時に、–without-bzip2をオプションパラメータとして付ける。
oss:/usr/local/src/lighttpd-1.4.19# ./configure –without-bzip2
oss:/usr/local/src/lighttpd-1.4.19# make
oss:/usr/local/src/lighttpd-1.4.19# make install
oss:/usr/local/src/lighttpd-1.4.19# ln -s /usr/local/sbin/lighttpd /usr/sbin/lighttpd
oss:/usr/local/src/lighttpd-1.4.19# cp doc/rc.lighttpd.redhat /etc/init.d/lighttpd
oss:/usr/local/src/lighttpd-1.4.19# chmod 755 /etc/init.d/lighttpd
oss:/usr/local/src/lighttpd-1.4.19# cp doc/lighttpd.conf /usr/local/etc/
□lighttpd.confの編集
必要以外の物は、かなり削ったんだなこれがまた。これは、あくまでも自分流設定なので各自カスタマイズして欲しい。
oss:/usr/local/src/lighttpd-1.4.19# vi /usr/local/etc/lighttpd.conf
# lighttpd configuration file
#
# use it as a base for lighttpd 1.0.0 and above
#
# $Id: lighttpd.conf,v 1.7 2004/11/03 22:26:05 weigon Exp $
############ Options you really have to take care of ####################
## modules to load
# at least mod_access and mod_accesslog should be loaded
# all other module should only be loaded if really neccesary
# – saves some time
# – saves memory
server.modules = (
“mod_fastcgi”,
“mod_rewrite”,
“mod_redirect”,
“mod_alias”,
“mod_access”,
“mod_auth”,
“mod_status”,
“mod_setenv”,
“mod_simple_vhost”,
“mod_userdir”,
“mod_cgi”,
“mod_ssi”,
“mod_accesslog” )
## a static document-root, for virtual-hosting take look at the
## server.virtual-* options
server.document-root = “/var/www/”
# UserDir
userdir.path = “public_html”
userdir.basepath = “/home/users/”
## where to send error-messages to
server.errorlog = “/var/log/lighttpd/error.log”
# files to check for if …/ is requested
index-file.names = ( “index.php”, “index.php5”,
“index.php4”, “index.php3”,
“index.html”,
“index.htm”, “default.htm” )
# mimetype mapping
mimetype.assign = (
“.pdf” => “application/pdf”,
“.sig” => “application/pgp-signature”,
“.spl” => “application/futuresplash”,
“.class” => “application/octet-stream”,
“.ps” => “application/postscript”,
“.torrent” => “application/x-bittorrent”,
“.dvi” => “application/x-dvi”,
“.gz” => “application/x-gzip”,
“.pac” => “application/x-ns-proxy-autoconfig”,
“.swf” => “application/x-shockwave-flash”,
“.tar.gz” => “application/x-tgz”,
“.tgz” => “application/x-tgz”,
“.tar” => “application/x-tar”,
“.zip” => “application/zip”,
“.mp3” => “audio/mpeg”,
“.m3u” => “audio/x-mpegurl”,
“.wma” => “audio/x-ms-wma”,
“.wax” => “audio/x-ms-wax”,
“.ogg” => “application/ogg”,
“.wav” => “audio/x-wav”,
“.gif” => “image/gif”,
“.jar” => “application/x-java-archive”,
“.jpg” => “image/jpeg”,
“.jpeg” => “image/jpeg”,
“.png” => “image/png”,
“.xbm” => “image/x-xbitmap”,
“.xpm” => “image/x-xpixmap”,
“.xwd” => “image/x-xwindowdump”,
“.css” => “text/css”,
“.html” => “text/html”,
“.htm” => “text/html”,
“.js” => “text/javascript”,
“.asc” => “text/plain”,
“.c” => “text/plain”,
“.cpp” => “text/plain”,
“.log” => “text/plain”,
“.conf” => “text/plain”,
“.text” => “text/plain”,
“.txt” => “text/plain”,
“.dtd” => “text/xml”,
“.xml” => “text/xml”,
“.mpeg” => “video/mpeg”,
“.mpg” => “video/mpeg”,
“.mov” => “video/quicktime”,
“.qt” => “video/quicktime”,
“.avi” => “video/x-msvideo”,
“.asf” => “video/x-ms-asf”,
“.asx” => “video/x-ms-asf”,
“.wmv” => “video/x-ms-wmv”,
“.bz2” => “application/x-bzip”,
“.tbz” => “application/x-bzip-compressed-tar”,
“.tar.bz2” => “application/x-bzip-compressed-tar”,
# default mime type
“” => “application/octet-stream”,
)
#### accesslog module
accesslog.filename = “|/usr/local/sbin/cronolog /var/log/lighttpd/access.log.%Y%m%d”
accesslog.format = “%h %l %u %t \”%r\” %>s %b \”%{Referer}i\” \”%{User-Agent}i\” “
# alias cgi-bin&icons
alias.url = (
“/cgi-bin/” => “/var/www/cgi-bin/”,
“/icons/” => “/var/www/icons/”
)
# Server Files Download Directry
$HTTP[“url”] =~”/download” {
dir-listing.activate = “enable”
}
url.access-deny = ( “~”, “.inc” )
$HTTP[“url”] =~ “\.pdf$” {
server.range-requests = “disable”
}
##
# which extensions should not be handle via static-file transfer
#
# .php, .pl, .fcgi are most often handled by mod_fastcgi or mod_cgi
static-file.exclude-extensions = ( “.php”,”.php5″,”.php4″,”.php3″, “.pl”, “.fcgi” )
######### Options that are good to be but not neccesary to be changed #######
## bind to port (default: 80)
server.port = 80
## error-handler for status 404
server.error-handler-404 = “/error-handler.html”
## to help the rc.scripts
server.pid-file = “/var/run/lighttpd.pid”
## change uid to <uid> (default: don’t care)
server.username = “www-data”
## change uid to <uid> (default: don’t care)
server.groupname = “www-data”
#### fastcgi module
## read fastcgi.txt for more info
## for PHP don’t forget to set cgi.fix_pathinfo = 1 in the php.ini
fastcgi.server = ( “.php” =>
( “localhost” =>
(
“socket” => “/var/run/lighttpd/php-fastcgi.socket”,
“bin-path” => “/usr/local/bin/php-cgi”
)
),
“.php5” =>
( “localhost” =>
(
“socket” => “/var/run/lighttpd/php-fastcgi.socket”,
“bin-path” => “/usr/local/bin/php-cgi”
)
),
“.php4” =>
( “localhost” =>
(
“socket” => “/var/run/lighttpd/php-fastcgi.socket”,
“bin-path” => “/usr/local/bin/php-cgi”
)
),
“.php3” =>
( “localhost” =>
(
“socket” => “/var/run/lighttpd/php-fastcgi.socket”,
“bin-path” => “/usr/local/bin/php-cgi”
)
)
)
#### CGI module
cgi.assign = ( “.pl” => “/usr/bin/perl”,
“.cgi” => “/usr/bin/perl” )
#### ssi
ssi.extension = ( “.shtml” )
□起動スクリプトの中身
Debianの起動スクリプトの書き方の約束事ができたようだ。※詳しくは、 ここ How to LSBize an Init Scriptを参照。
以下の起動スクリプト中では、
### BEGIN INIT INFO
# Provides: lighttpd
# Required-Start: $remote_fs
# Required-Stop: $remote_fs
# Should-Start: $network $syslog
# Should-Stop: $network $syslog
# Default-Start: 2 3 4 5
# Default-Stop: 0 1 6
# Short-Description: Start and stop lighttpd
# Description: lighttpd is a Web Server (Web)
# which translates ip addresses to and from internet names
### END INIT INFO
の部分だ。
oss:/usr/local/src/lighttpd-1.4.19# vi /etc/init.d/lighttpd
#! /bin/sh
# /etc/init.d/lighttpd
### BEGIN INIT INFO
# Provides: lighttpd
# Required-Start: $remote_fs
# Required-Stop: $remote_fs
# Should-Start: $network $syslog
# Should-Stop: $network $syslog
# Default-Start: 2 3 4 5
# Default-Stop: 0 1 6
# Short-Description: Start and stop lighttpd
# Description: lighttpd is a Web Server (Web)
# which translates ip addresses to and from internet names
### END INIT INFO
if [ -z “$LIGHTTPD_CONF_PATH” ]; then
LIGHTTPD_CONF_PATH=”/usr/local/etc/lighttpd.conf“
fi
prog=”lighttpd”
lighttpd=”/usr/sbin/lighttpd”
RETVAL=0
start() {
echo -n $”Starting $prog: “
$lighttpd -f $LIGHTTPD_CONF_PATH
RETVAL=$?
echo
[ $RETVAL -eq 0 ] && touch /var/lock/$prog
return $RETVAL
}
stop() {
echo -n $”Stopping $prog: “
killall $lighttpd
killall php
RETVAL=$?
echo
return $RETVAL
}
reload() {
echo -n $”Reloading $prog: “
killall $lighttpd -HUP
killall php -HUP
RETVAL=$?
echo
return $RETVAL
}
case “$1” in
start)
start
;;
stop)
stop
;;
restart)
stop
start
;;
condrestart)
if [ -f /var/lock/$prog ]; then
stop
start
fi
;;
reload)
reload
;;
status)
status $lighttpd
RETVAL=$?
;;
*)
echo $”Usage: $0 {start|stop|restart|condrestart|reload|status}”
RETVAL=1
esac
exit $RETVAL
□起動
oss:/usr/local/src/lighttpd-1.4.19# /etc/init.d/lighttpd start
Starting lighttpd:
起動してるかどうか、プロセスを確認する。
oss:/usr/local/src/lighttpd-1.4.19# ps -ef | grep lighttpd
www-data 11663 1 0 00:07 ? 00:00:00 www-data 11674 11663 0 00:07 ? 00:00:00 /usr/local/sbin/cronolog /var/log/lighttpd/access.log.%Y%m%d
root 11677 26191 0 00:07 pts/1 00:00:00 grep lighttpd
□その他すること
stopスクリプトを生かすために、killallコマンドをインスコする。
oss:/usr/local/src/lighttpd-1.4.19# apt-get install psmisc sysvinit-utils
■ CentOS 5 編(lighttpd + php + mysql連携)
lighttpd+php+mysqlをCentOSのバイナリでセットアップする場合、気をつけなければならないことは、fastcgiを使うためにphpをリビルドしなければならないことだ。具体的には、src.rpmファイルをダウンロードして.specファイルを編集(–enable-fastcgi –enable-discard-pathパラメータを追加して不要なパラメータを消す)して、rpmrebuildコマンドで、リビルドする。俺、個人としては非常に面倒だしリスクを伴うと思う。したがって、CentOSでlighttpd+php連携を行うには、個人的にはlighttpd(バイナリ) + php(ソース) + mysql(ソース)の構成がセットアップの容易さでもベストだと考える。ここでは、この構成で説明する。
注:
この説明の中で、mysqlは ここ を参考にしてあらかじめインストールされているものとして説明する。
1.lighttpdバイナリをインスコ
まず、lighttpdとfastcgiをyumで簡単インストールしよう。yumのアップデートを調べる。
[root@note ~]# yum check-update
アップデートが有れば、
[root@note ~]# yum update
lighttpdとfastcgiをインストールする。
[root@note ~]# yum install lighttpd lighttpd-fastcgi
Loading “fastestmirror” plugin
Loading “installonlyn” plugin
Setting up Install Process
Setting up repositories
Loading mirror speeds from cached hostfile
Reading repository metadata in from local files
Parsing package install arguments
Resolving Dependencies
–> Populating transaction set with selected packages. Please wait.
—> Downloading header for lighttpd to pack into transaction set.
lighttpd-1.4.18-1.el5.rf. 100% |=========================| 17 kB 00:00
—> Package lighttpd.i386 0:1.4.18-1.el5.rf set to be updated
—> Downloading header for lighttpd-fastcgi to pack into transaction set.
lighttpd-fastcgi-1.4.18-1 100% |=========================| 4.4 kB 00:00
—> Package lighttpd-fastcgi.i386 0:1.4.18-1.el5.rf set to be updated
–> Running transaction check
Dependencies Resolved
=============================================================================
Package Arch Version Repository Size
=============================================================================
Installing:
lighttpd i386 1.4.18-1.el5.rf dag 1.1 M
lighttpd-fastcgi i386 1.4.18-1.el5.rf dag 81 k
Transaction Summary
=============================================================================
Install 2 Package(s)
Update 0 Package(s)
Remove 0 Package(s)
Total download size: 1.2 M
Is this ok [y/N]: y
Downloading Packages:
(1/2): lighttpd-1.4.18-1. 100% |=========================| 1.1 MB 00:35
(2/2): lighttpd-fastcgi-1 100% |=========================| 81 kB 00:01
Running Transaction Test
Finished Transaction Test
Transaction Test Succeeded
Running Transaction
Installing: lighttpd ######################### [1/2]
Installing: lighttpd-fastcgi ######################### [2/2]
Installed: lighttpd.i386 0:1.4.18-1.el5.rf lighttpd-fastcgi.i386 0:1.4.18-1.el5.rf
Complete!
2.logローテーションを行うcronologをインスコする
[root@note ~]# yum install cronolog
Loading “fastestmirror” plugin
Loading “installonlyn” plugin
Setting up Install Process
Setting up repositories
Loading mirror speeds from cached hostfile
Reading repository metadata in from local files
Parsing package install arguments
Resolving Dependencies
–> Populating transaction set with selected packages. Please wait.
—> Downloading header for cronolog to pack into transaction set.
cronolog-1.6.2-1.el5.rf.i 100% |=========================| 4.0 kB 00:00
—> Package cronolog.i386 0:1.6.2-1.el5.rf set to be updated
–> Running transaction check
Dependencies Resolved
=============================================================================
Package Arch Version Repository Size
=============================================================================
Installing:
cronolog i386 1.6.2-1.el5.rf dag 34 k
Transaction Summary
=============================================================================
Install 1 Package(s)
Update 0 Package(s)
Remove 0 Package(s)
Total download size: 34 k
Is this ok [y/N]: y
Downloading Packages:
(1/1): cronolog-1.6.2-1.e 100% |=========================| 34 kB 00:00
Running Transaction Test
Finished Transaction Test
Transaction Test Succeeded
Running Transaction
Installing: cronolog ######################### [1/1]
Installed: cronolog.i386 0:1.6.2-1.el5.rf
Complete!
phpをインストールするときに使うzlibとlibxmlをインストールする。
3.phpのインスコ
phpで使うzlibとlibxml2をインスコする
[root@note ~]# yum install libxml2-devel zlib
phpのソースをwgetして、ビルドする。
[root@note ~]# cd /usr/local/src/
[root@note src]# wget http://jp.php.net/get/php-5.2.4.tar.gz/from/this/mirror
[root@note src]# tar zxvf php-5.2.4.tar.gz
[root@note src]# chown -R root.root php-5.2.4
[root@note src]# cd php-5.2.4
mysqlとfastcgiを組み込むためのMakefileを作るには、以下のフルパラメータでconfigureを行う。
[root@note php-5.2.4]# ./configure –enable-fastcgi –enable-discard-path –enable-force-cgi-redirect –enable-mbstring –enable-mbregex –enable-mbstr-enc-trans –enable-iconv –with-mysql=/usr/local/mysql –with-zlib
[root@note php-5.2.4]# make
[root@note php-5.2.4]# make install
念のため、開発環境も整備しておこう。
[root@note ~]# yum install gcc-c++ gcc-java gcc-objc gcc4 gcc4-c++ autoconf libtool automake bison flex ncurses-devel
4.lighttpdを設定する
lighttpdの設定ファイルをカスタマイズする。ここでは、phpを使える環境に設定している。
[root@note ~]# vi /etc/lighttpd/lighttpd.conf
server.modules = (
”mod_fastcgi”,
”mod_cgi”,
”mod_rewrite”,
”mod_access”,
”mod_auth”,
”mod_setenv”,
”mod_userdir”,
”mod_simple_vhost”,
”mod_alias”,
# “mod_dirlisting”, ←serverモジュールにこれが無いようだ、エラーになる。 ”mod_accesslog” )
server.document-root = “/var/www/”
userdir.path = “public_html”
# userdir.basepath = “/home/” ←このパラメータの記述では、エラーが出る。
alias.url = (
”/cgi-bin/” => “/var/cgi-bin/”,
”/icons/” => “/var/icons/”
)
server.errorlog = “/var/log/lighttpd/error_log”
$HTTP[“url”] =~”/download” {
dir-listing.activate = “enable”
}
# index-file.names = ( “index.php”, “index.html”,# “index.htm”, “default.htm”,# “index.cgi”, “index.pl” )
server.indexfiles = ( “index.php”, “index.html”, ←indexファイル定義のパラメータが、これでないとエラーが出る。
”index.htm”, “default.htm”,
”index.cgi”, “index.pl”,
”index.php4″, “index.php3” )
mimetype.assign = (
”.pdf” => “application/pdf”,
”.sig” => “application/pgp-signature”,
”.spl” => “application/futuresplash”,
”.class” => “application/octet-stream”,
”.ps” => “application/postscript”,
”.torrent” => “application/x-bittorrent”,
”.dvi” => “application/x-dvi”,
”.gz” => “application/x-gzip”,
”.pac” => “application/x-ns-proxy-autoconfig”,
”.swf” => “application/x-shockwave-flash”,
”.tar.gz” => “application/x-tgz”,
”.tgz” => “application/x-tgz”,
”.tar” => “application/x-tar”,
”.zip” => “application/zip”,
”.mp3″ => “audio/mpeg”,
”.m3u” => “audio/x-mpegurl”,
”.wma” => “audio/x-ms-wma”,
”.wax” => “audio/x-ms-wax”,
”.ogg” => “application/ogg”,
”.wav” => “audio/x-wav”,
”.gif” => “image/gif”,
”.jpg” => “image/jpeg”,
”.jpeg” => “image/jpeg”,
”.png” => “image/png”,
”.xbm” => “image/x-xbitmap”,
”.xpm” => “image/x-xpixmap”,
”.xwd” => “image/x-xwindowdump”,
”.css” => “text/css”,
”.html” => “text/html”,
”.htm” => “text/html”,
”.js” => “text/javascript”,
”.asc” => “text/plain”,
”.c” => “text/plain”,
”.cpp” => “text/plain”,
”.log” => “text/plain”,
”.conf” => “text/plain”,
”.text” => “text/plain”,
”.txt” => “text/plain”,
”.dtd” => “text/xml”,
”.xml” => “text/xml”,
”.mpeg” => “video/mpeg”,
”.mpg” => “video/mpeg”,
”.mov” => “video/quicktime”,
”.qt” => “video/quicktime”,
”.avi” => “video/x-msvideo”,
”.asf” => “video/x-ms-asf”,
”.asx” => “video/x-ms-asf”,
”.wmv” => “video/x-ms-wmv”,
”.bz2″ => “application/x-bzip”,
”.tbz” => “application/x-bzip-compressed-tar”,
”.tar.bz2″ => “application/x-bzip-compressed-tar”
)
accesslog.filename = “|/usr/sbin/cronolog /var/log/lighttpd/access_log.%Y%m%d”
server.port = 7000
accesslog.format = “%h %l %u %t \”%r\” %>s %b \”%{Referer}i\” \”%{User-Agent}i\””
server.error-handler-404 = “/404.html”
server.pid-file = “/var/run/lighttpd.pid”
server.username = “nobody”
server.groupname = “nobody”
fastcgi.server = ( “.php” =>
( “localhost” =>
(
”socket” => “/tmp/php-fastcgi.socket”,
”bin-path” => “/usr/local/bin/php-cgi”
)
),
“.php5” =>
( “localhost” =>
(
”socket” => “/tmp/php-fastcgi.socket”,
”bin-path” => “/usr/local/bin/php-cgi”
)
),
“.php4” =>
( “localhost” =>
(
”socket” => “/tmp/php-fastcgi.socket”,
”bin-path” => “/usr/local/bin/php-cgi”
)
),
“.php3” =>
( “localhost” =>
(
“socket” => “/tmp/php-fastcgi.socket”,
“bin-path” => “/usr/local/bin/php-cgi”
)
)
)
cgi.assign = ( “.pl” => “/usr/bin/perl”,”.cgi” => “/usr/bin/perl” )
5.起動する
起動ファイルを覗く。
[root@note ~]# cd /etc/init.d/
[root@note init.d]# more lighttpd
#!/bin/sh
#
# lighttpd Startup script for the lighttpd server
#
# chkconfig: – 85 15
# description: Lightning fast webserver with light system requirements
#
# processname: lighttpd
# config: /etc/lighttpd/lighttpd.conf
# config: /etc/sysconfig/lighttpd
# pidfile: /var/run/lighttpd.pid
#
# Note: pidfile is assumed to be created
# by lighttpd (config: server.pid-file).
# If not, uncomment ‘pidof’ line.
# Source function library
. /etc/rc.d/init.d/functions
if [ -f /etc/sysconfig/lighttpd ]; then
. /etc/sysconfig/lighttpd
fi
if [ -z “$LIGHTTPD_CONF_PATH” ]; then
LIGHTTPD_CONF_PATH=”/etc/lighttpd/lighttpd.conf”
fi
prog=”lighttpd”
lighttpd=”/usr/sbin/lighttpd”
RETVAL=0
start() {
echo -n $”Starting $prog: “
daemon $lighttpd -f $LIGHTTPD_CONF_PATH
RETVAL=$?
echo
[ $RETVAL -eq 0 ] && touch /var/lock/subsys/$prog
return $RETVAL
}
stop() {
echo -n $”Stopping $prog: “
killproc $lighttpd
RETVAL=$?
echo
[ $RETVAL -eq 0 ] && rm -f /var/lock/subsys/$prog
return $RETVAL
}
reload() {
echo -n $”Reloading $prog: “
killproc $lighttpd -HUP
RETVAL=$?
echo
return $RETVAL
}
case “$1” in
start)
start
;;
stop)
stop
;;
restart)
stop
start
;;
condrestart)
if [ -f /var/lock/subsys/$prog ]; then
stop
start
fi
;;
reload)
reload
;;
status)
status $lighttpd
RETVAL=$?
;;
*)
echo $”Usage: $0 {start|stop|restart|condrestart|reload|status}”
RETVAL=1
esac
exit $RETVAL
lighttpdを起動する。
[root@note init.d]# ./lighttpd start
Starting lighttpd: [ OK ]
■ その他各ディストリビューションインストール編
◆ 簡単モジュール説明
■ mod_accesslog
アクセスログを使う。
使い方(何れも cronolog でログのローティションを行う例):
* バーチャルホストとして設定する場合、
accesslog.filename = “/var/log/lighttpd.log”
$HTTP[“host”] == “mail.example.org” {
accesslog.filename = “|/usr/bin/cronolog”
}
* 通常の場合、
accesslog.filename = “|/usr/local/sbin/cronolog /usr/local/apache/logs/access_log.%Y%m%d”
%Y%m%dは、年号と日付が入る。
■ mod_access
読み分け記号(~)で終わったすべてのファイルへのアクセスもしくは~や.incなどで例えば、example.incを拒否するでしょう。 ~のような読み分け記号はバックアップファイルにしばしばエディタによって使用されます。 そして、.inc拡張子はインクルードファイルにしばしばコードで使用されます。このように、拒否したい拡張子のファイルなどを定義したいときは便利です。
使い方:
url.access-deny = ( “~”, “.inc”)
■ mod_alias
ディレクトリエーリアス。
使い方:
alias.url = ( “/cgi-bin/” => “/var/www/servers/www.example.org/cgi-bin/” )
■ mod_cgi
CGIを使う。
使い方:
cgi.assign = ( “.pl” => “/usr/bin/perl”,
“.cgi” => “/usr/bin/perl” )
■ mod_compress
アウトプット圧縮。
使い方:* 通常の場合
compress.cache-dir = “/var/www/cache/”
compress.filetype = (“text/plain”, “text/html”)
* バーチャルホストとしての定義
$HTTP[“host”] == “docs.example.org” {
compress.cache-dir = “/var/www/cache/docs.example.org/”
}
compress.filetype = (“text/plain”, “text/html”)
■ mod_dirlisting
Apacheで言うディレクトリインデックス。ディレクトリリスト表示。使い方:
dir-listing.activate = “enable”
$HTTP[“url”] =~ “^/download($|/)” {
dir-listing.activate = “enable”
}
index-file.names = ( “/dir-generator.php” )
■ mod_evhost
ワイルドカードを含むパターンに基づくドキュメントルートを作る。 それらのワイルドカードが出力されたホスト名であるなら部品を表すことができる。
使い方:
%% => % sign
%0 => domain name + tld
%1 => tld
%2 => domain name without tld
%3 => subdomain 1 name
%4 => subdomain 2 name
evhost.path-pattern = “/home/www/servers/%3/pages/”
■ mod_expire
HTTP/1.0のメッセージのResponse HeaderでExpireヘッダーを監視する。
expire.url = ( “/images/” => “access 1 hour” )
■ mod_fastcgi
CGI版スクリプトを指定する。lighttpdは、CGI経由で色々なスクリプトを実行する構造になってる。したがって、以下の例のようにPHPもCGI経由で実行される。
使い方:
以下はCGI経由のPHPを定義している。
fastcgi.server = ( “.php” =>
( “localhost” =>
(
”socket” => “/tmp/php-fastcgi.socket”,
”bin-path” => “/usr/local/bin/php”
)
),
”.php4″ =>
( “localhost” =>
(
”socket” => “/tmp/php-fastcgi.socket”,
”bin-path” => “/usr/local/bin/php”
)
),
”.php3″ =>
( “localhost” =>
(
”socket” => “/tmp/php-fastcgi.socket”,
”bin-path” => “/usr/local/bin/php”
)
)
)
■ mod_mysql_vhost
MySQLベースのvhostingで、あなたはMySQLデータベースの与えられたホストのドキュメントルートとして経路を保存することができる。
使い方:
mysql-vhost.db = “lighttpd”
mysql-vhost.user = “lighttpd”
mysql-vhost.pass = “secret”
mysql-vhost.sock = “/var/mysql.lighttpd.sock”
mysql-vhost.sql = “SELECT docroot FROM domains WHERE domain=’?'”
MySQL setup:
mysql> GRANT SELECT ON lighttpd.* TO lighttpd@localhost IDENTIFIED BY ‘secret’;
mysql> CREATE DATABASE lighttpd;
mysql> USE lighttpd;
mysql> CREATE TABLE domains ( domain varchar(64) not null primary key, docroot varchar(128) not null );
mysql> INSERT INTO domains VALUES (‘host.dom.ain’,’/http/host.dom.ain/’);
■ mod_proxy
lighttpdでHTTPインタフェースを持っているjavaサーバに接続するプロキシモジュールの最も簡単な方法。
使い方:
$HTTP[“host”] == “www.example.org” {
proxy.balance = “hash”
proxy.server = ( “” => ( ( “host” => “10.0.0.10” ),
( “host” => “10.0.0.11” ),
( “host” => “10.0.0.12” ),
( “host” => “10.0.0.13” ),
( “host” => “10.0.0.14” ),
( “host” => “10.0.0.15” ),
( “host” => “10.0.0.16” ),
( “host” => “10.0.0.17” ) ) )
■ mod_redirect
外部の直接リダイレクトしたいURLを設定する。
使い方:
url.redirect = ( “^/show/([0-9]+)/([0-9]+)$” => “http://www.example.org/show.php?isdn=$1&page$2”,
“^/get/([0-9]+)/([0-9]+)$” => “http://www.example.org/get.php?isdn=$1&page$2” )
$HTTP[“host”] =~ “^www\.(.*)” {
url.redirect = ( “^/(.*)” => “http://%1/$1” )
}
■ mod_rewrite
アクセスするURLを正規表現で書き換える。
使い方:
url.rewrite-once = ( “^/id/([0-9]+)$” => “/index.php?id=$1”,
“^/link/([a-zA-Z]+)” => “/index.php?link=$1” )
server.document-root = “/www/htdocs/”
$HTTP[“host”] =~ “^.*\.([^.]+\.com)$” {
url.rewrite-once = ( “^/(.*)” => “/%0/$1” )
}
■ mod_rrdtool
RRDツールを使う。
RRDは保存するシステムとディスプレイ時系列データ(すなわち、ネットワーク帯域幅、印刷室温度、サーバ負荷平均)である。
使い方:
rrdtool.binary = “/usr/bin/rrdtool”
rrdtool.db-name = “/var/www/lighttpd.rrd”
■ mod_scgi
SCGIは速くて簡易型のCGIインタフェースです。
■ mod_secdownload
深いリンクに反対する認証されているファイル要求の対策は、mod_secdownloadを使って容易に達成できます。さらに、ダウンロードを高速に行えます。
使い方:
secdownload.secret = <string>
secdownload.document-root = <string>
secdownload.uri-prefix = <string> (default: /)
secdownload.timeout = <short> (default: 60 seconds)
■ mod_setenv
リクエストを分割する機能を提供します。
使い方:
setenv.add-environment
adds a value to the process environment that is passed to the external applications
setenv.add-response-header
adds a header to the HTTP response sent to the client
setenv.add-request-header
adds a header to the HTTP request that was received from the client
■ mod_simple_vhost
簡易バーチャルホスト定義。
使い方:
simple-vhost.server-root = “/var/www/servers/”
simple-vhost.default-host = “www.example.org”
simple-vhost.document-root = “pages”
$HTTP[“host”] == “news.example.org” {
server.document-root = “/var/www/servers/news2.example.org/pages/”
}
■ mod_ssi
サーバサイドインクルード。Apache SSIとコンパチブルレイヤーを提供します。
使い方:
server.modules = ( …, “mod_ssi”, … )
ssi.extension = ( “.shtml” )
■ mod_status
mod_statusはサーバーのステータスとコンフィギュレーションを表示します。
使い方:
* mod_statusを使うためにモジュールをロードする。
server.modules = ( …, “mod_status”, … )
* デフォルトで、ステータスページは、未認証のユーザーから内部の情報を隠すために使用不可にされます。
status.status-url = “/server-status”
* ローカルIPからステータスページを開きたい場合は、
$HTTP[“remoteip”] == “10.0.0.0/8” {
status.status-url = “/server-status”
}
■ mod_auth
auth.require = ( “/server-status” =>
( “realm” … ) )
* 認証を必要とする場合(Digest認証)
この説明では、 Document root/hoge ディレクトリへ認証を掛けることを前提としている。
# htdigest -c /usr/local/etc/lighttpd.user.htdigest hoge
Adding password for secret in realm Security Zone.
New password: ←ユーザー認証用のパスワードを入力
Re-type new password: ←ユーザー認証用のパスワードを再入力
lighttpdの設定ファイル( /usr/local/etc/lighttpd.conf )を変更する。
server.modules = (
省略
“mod_auth”,
省略
“mod_accesslog” )
以下の記述を適当な場所に追加する。ここでは、ユーザー認証によるアクセス制限をかけるディレクトリを/usr/local/apache/htdocs/hogeとしている。
auth.backend = “htdigest”
auth.backend.htdigest.userfile = “/usr/local/etc/lighttpd.user.htdigest”
auth.require = ( “/hoge/” => ←ユーザー認証が必要なディレクトリ
(
“method” => “digest”,
“realm” => “Security Zone”, ←htdigestコマンドで指定したレルム
“require” => “valid-user” ←”user=hoge”とすると、ユーザーを限定可能
)
)
* 認証を必要とする場合(Basict認証)
この説明では、 Document root/hoge ディレクトリへ認証を掛けることを前提としている。
# htpasswd -c /usr/local/etc/lighttpd.user.basic hoge
Adding password for secret in realm Security Zone.
New password: ←ユーザー認証用のパスワードを入力
Re-type new password: ←ユーザー認証用のパスワードを再入力
lighttpdの設定ファイル( /usr/local/etc/lighttpd.conf )を変更する。
server.modules = (
省略
“mod_auth”,
省略
“mod_accesslog” )
以下の記述を適当な場所に追加する。ここでは、ユーザー認証によるアクセス制限をかけるディレクトリを/usr/local/apache/htdocs/hogeとしている。
auth.backend = “htpasswd”
auth.backend.htpasswd.userfile = “/usr/local/etc/lighttpd.user.basic”
auth.require = ( “/hoge/” => ←ユーザー認証が必要なディレクトリ
(
“method” => “basic”,
“realm” => “Security Zone”, ←htpasswdコマンドで指定したレルム
“require” => “valid-user” ←”user=hoge”とすると、ユーザーを限定可能
)
)
lighttpd.confの変更が終わったら、lighttpdを再起動する。
■ mod_trigger_b4_dl
使い方:
trigger-before-download.gdbm-filename = “/home/weigon/testbase/trigger.db”
trigger-before-download.memcache-hosts = ( “127.0.0.1:11211” )
trigger-before-download.trigger-url = “^/trigger/”
trigger-before-download.download-url = “^/download/”
trigger-before-download.deny-url = “http://192.168.1.5:1025/index.html”
trigger-before-download.trigger-timeout = 10
■ mod_userdir
ユーザサイトを定義する。
使い方:
* ユーザ公開ディレクトリ名
userdir.path = “public_html”
* ユーザ公開ディレクトリパス(通常は、 /home/ で良いと思う)
userdir.basepath = “/home/users/”
■ mod_webdav
webdavを使う。
使い方:
$HTTP[“url”] =~ “^/dav($|/)” {
webdav.activate = “enable”
webdav.is-readonly = “enable”
}
◆ メーリングリスト
準備中
lighttpd was made by lighttpd.net .